Retail shelf presentation
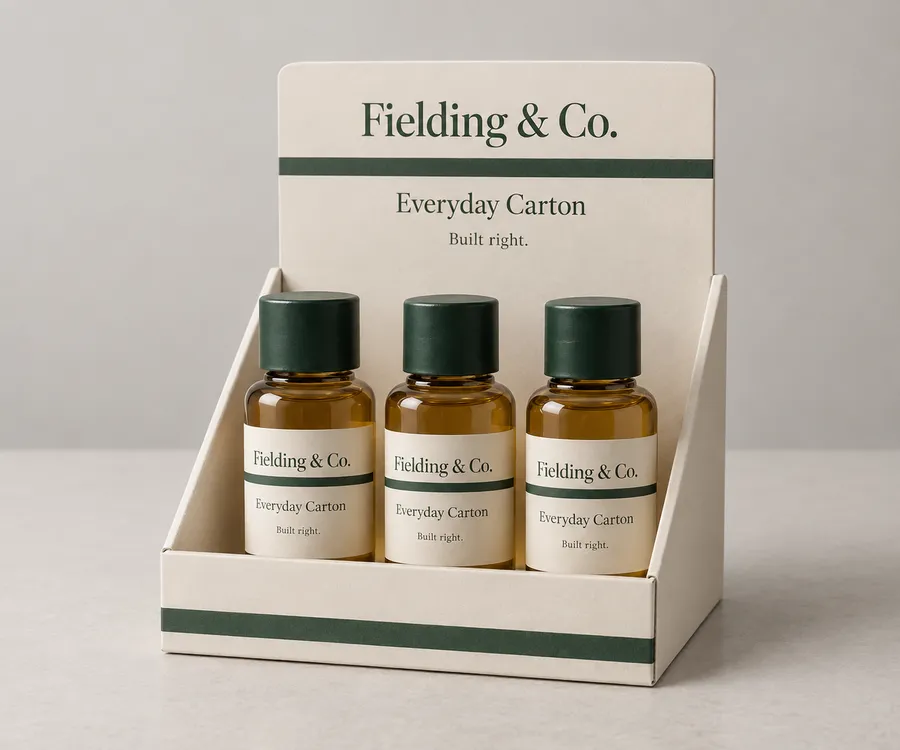
A shelf-ready display can organize a row of products while keeping the front panel or header visible. The shelf height, product count, facing plan, and loading direction should shape the brief.

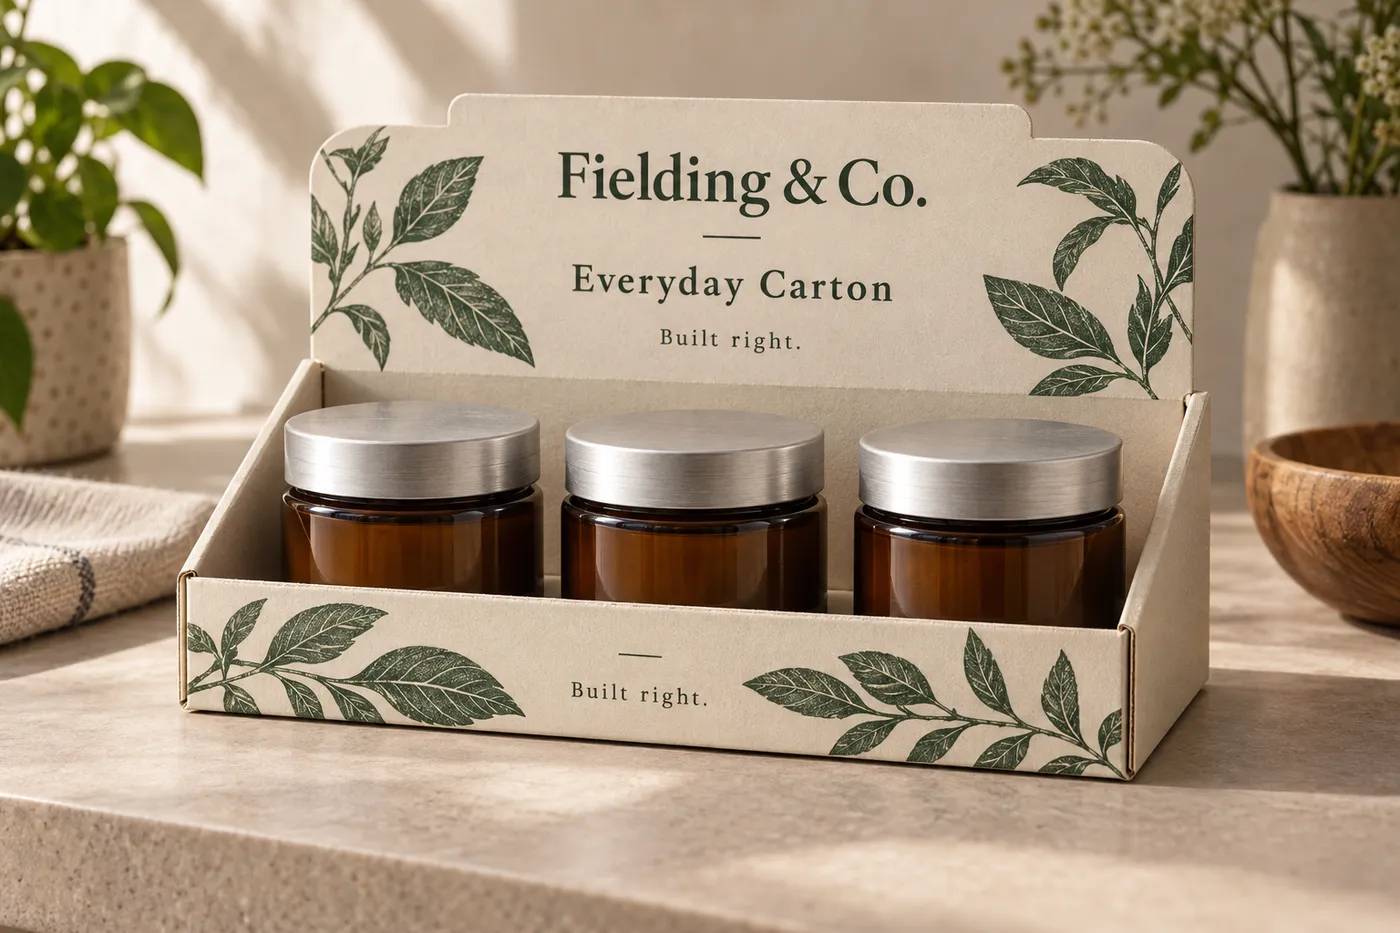
Open-front cardboard display box with three amber jars and a printed raised back panel on a retail counter.
Cardboard Boxes
Cardboard display boxes put a product, its front panel, and its brand message into one shelf- or countertop-ready format. Choose the outer footprint around the packed product, decide how many facings the display should present, then review board, internal support, print coverage, and finish together before the dieline is finalized.
Last updated
Working quote
Product brief
A cardboard display box has a different job from a closed shipping carton: it must hold the product in a deliberate position while giving the buyer a clear view of the front, side, or top panel. Start with the retail setting. A countertop unit may need a compact footprint and an easy front-facing reveal; a shelf display may need a taller back panel, a defined product row, or a branded surface that remains visible beside neighboring packs. The right format depends on the product dimensions, loaded weight, number of facings, and how the customer is expected to pick it up.
The design brief should name the product being presented, the quantity shown at one time, the intended orientation, and the space available at the point of use. Those inputs are more useful than choosing a generic box shape first. A display can be fully enclosed, open at the front, or built with a raised panel and product cavity, but each choice changes the dieline and the way the artwork is seen.
Measure the packed product in the position it will occupy, including any closure, sleeve, cap, tab, or other part that changes its outer profile. Record the assembled height, width, and depth, then note which face should point toward the shopper. If several items share one display, provide the quantity per row or tier, the number of visible facings, and whether products are loaded upright, flat, or at an angle. A photograph or physical sample can help clarify a shape that three basic measurements cannot fully describe.
Also describe the footprint the finished display can occupy. A countertop unit has a practical base area, while a shelf unit may be constrained by the shelf height and the adjacent products. The outer dimensions, product clearance, support features, and panel position are reviewed together; changing the product orientation can change the board layout even when the product itself stays the same. Avoid assuming that one dieline covers every size. A different product count, facing arrangement, or display height can require its own structural review.
Board choice affects how the display stands, folds, prints, and handles during loading. Corrugated board can suit a display that needs a more substantial fluted structure for a shelf or counter setting. SBS paperboard offers a smooth printed surface for a folding display where artwork coverage and clean folds are central to the brief. Kraft paperboard brings a natural surface character that can work with a more restrained printed treatment. The suitable choice depends on the display footprint, product weight, support geometry, and the presentation you want at the point of sale.
The same product can be approached with more than one structure. A low, open-front format emphasizes access and product visibility; a deeper cavity or raised back panel changes how the display carries and frames the items. Internal support may be integrated into the paperboard structure or supplied as a separate insert, depending on product geometry, weight, fragility, orientation, loading method, and the desired presentation. Those factors should be reviewed together rather than reduced to one default insert rule.
Artwork should follow the surfaces that a shopper will actually see: the front lip, side panels, backer, header, and any inside surface that becomes visible when the product is loaded. Keep the brand name, product name, and essential buying information positioned for the display orientation, not simply centered on a flat dieline. The digital proof should be reviewed after the structure and artwork placement are understood, because a fold, opening, or raised panel can change which part of the design receives attention.
Foil stamping can highlight selected marks or linework when the artwork and board are suitable for that treatment. Matte lamination can give the display a lower-glare surface, while gloss lamination can create a brighter surface appearance. These finishes are choices to review against the board, artwork, handling, and intended lighting; none should be treated as a universal requirement.
A useful quote request includes the packed product dimensions, product count per display, number of facings, preferred orientation, shelf or countertop setting, desired board type, print coverage, finish preference, and any internal support requirement. If you already have artwork, identify which panels carry the main message and which areas can remain unprinted. If the structure is still open, share photographs or a sample so the display geometry can be discussed before the dieline is prepared.
The standard minimum order is 50 units. Production is from 7 business days after digital proof approval, and free US shipping is available on the standard fulfillment path. A sample kit carries a $44.99 shipping charge credited toward the first order, giving you a physical reference for board surface, print treatment, and the way the display presents the packed product. The quotation then turns the product information into a reviewed structure, artwork placement, and production-ready specification.
Cardboard display boxes work best when the display environment is part of the brief from the beginning. Tell us where the unit will sit, what the customer must see first, how the products will be loaded, and which brand surfaces matter most. That makes the structural and visual decisions easier to review before production starts.
Proof points
A display specification connects the physical product to the retail setting. The review focuses on the parts of the structure and artwork that affect loading, visibility, and the way the finished unit sits in use.
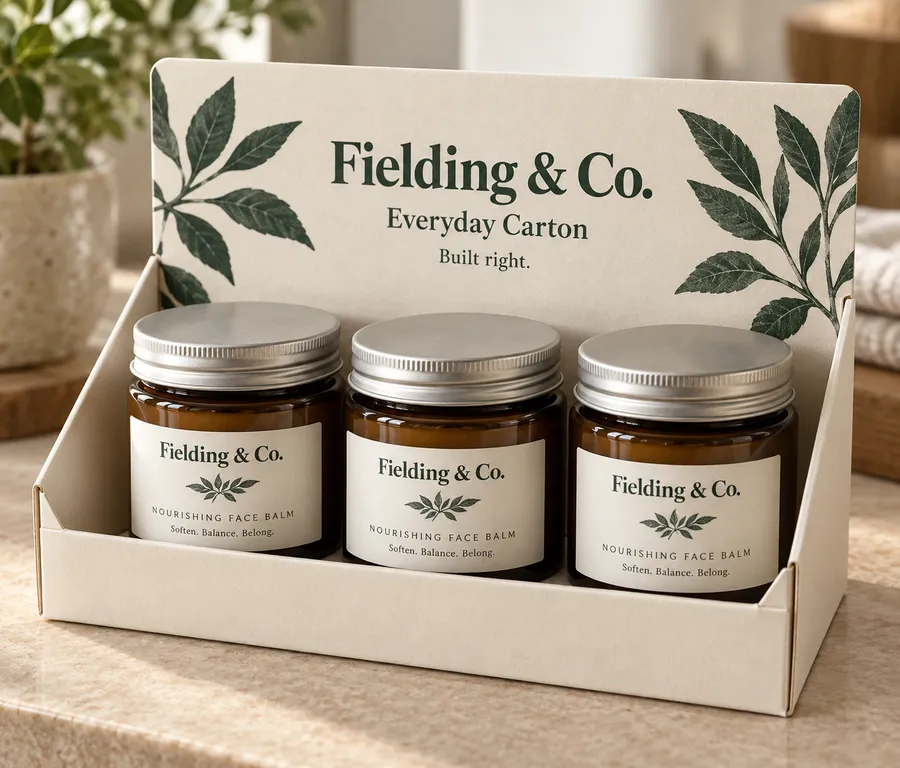
Cardboard display boxes combine a product cavity with the visible surfaces that frame a retail presentation. The structure can be planned for a shelf, countertop, or other defined display setting, with the footprint, number of facings, loading direction, and panel visibility decided around the actual packed product.
A shelf-ready display can organize a row of products while keeping the front panel or header visible. The shelf height, product count, facing plan, and loading direction should shape the brief.
A counter unit can frame a smaller assortment near a point of service. Its footprint, front access, back panel, and loaded weight need to work together in the space available.
A printed display can introduce a new product or seasonal assortment when the artwork needs a larger branded surface than the individual pack provides.
Printed surfaces can carry the brand name, product message, and directional information across the front, sides, header, or visible interior. Finish selection should be reviewed with the board, artwork, handling, and lighting in mind.
The most useful brief describes where the display will sit and what the shopper should see first. That context guides the outer footprint, support features, board choice, and artwork placement before a dieline is reviewed.
Share the available footprint, height constraints, loading direction, and the surfaces that must remain visible after the products are placed.
Provide packed dimensions, product count, orientation, loaded weight, and the number of front-facing items the display should present.
Choose from the relevant paperboard or corrugated construction and identify the print coverage and finish treatment that support the intended presentation.
A clear quote request gives the structure and artwork review a useful starting point. The process then moves from product information to a reviewed proof before production.
Send packed dimensions, product count, orientation, loaded weight, display location, facing plan, and any photographs or physical samples that clarify the brief.
Identify the board preference, print coverage, visible panels, finish direction, and any internal support or loading feature you want considered.
The structure and artwork placement are reviewed together, then the digital proof is approved before production begins.
Approve the quoted specification, quantity, and final artwork so the display can move into production on the agreed path.
Need help with structure, materials, or production planning? See how we manufacture custom packaging.
Request a sample kit to compare paperboard and corrugated surfaces, print treatment, and the way a display format presents a packed product. The $44.99 shipping charge is credited toward your first order.
Shipping charge: $44.99. Credited toward your first order.
Request a Sample KitFind clear answers about fit, materials, and ordering below.
Share the packed product dimensions, product count, orientation, loaded weight, display setting, facing plan, preferred board, print coverage, finish direction, and any internal support requirement. Photos or a sample can help explain the shape and loading method.
Yes. The shelf or countertop setting should be part of the brief because it affects the footprint, panel height, access, loading direction, and which printed surfaces remain visible after the products are placed.
The category options include Corrugated Board, SBS Paperboard, and Kraft Paperboard. The suitable choice depends on the display geometry, loaded product, desired surface, and the way the unit will be handled.
Production is from 7 business days after digital proof approval on the standard path. The final timing is tied to the reviewed specification, artwork, and approved order.
Orders start at 50 units and scale up to 500,000 for bulk runs, with pricing from $0.35 per unit on larger quantities. Standard production is from 7 business days after digital proof approval.
Cardboard display boxes put a product, its front panel, and its brand message into one shelf- or countertop-ready format. Each order is made to order around your packed product and artwork, and the specification is confirmed against a digital proof before production.
Common uses include retail shelf presentation, countertop product display, and launch or promotional presentation. The final specification is set by the packed product and how it will be handled.
Compare nearby products and request the format that best fits your next run.
Available product
Available product
Available product
Available product
Plan the display around the product
Send the packed product dimensions, display setting, facing plan, artwork status, and any board or finish preference. We can use those details to shape the quote and next review.
Add your product details to see a quote summary.