Beverage counter assortment
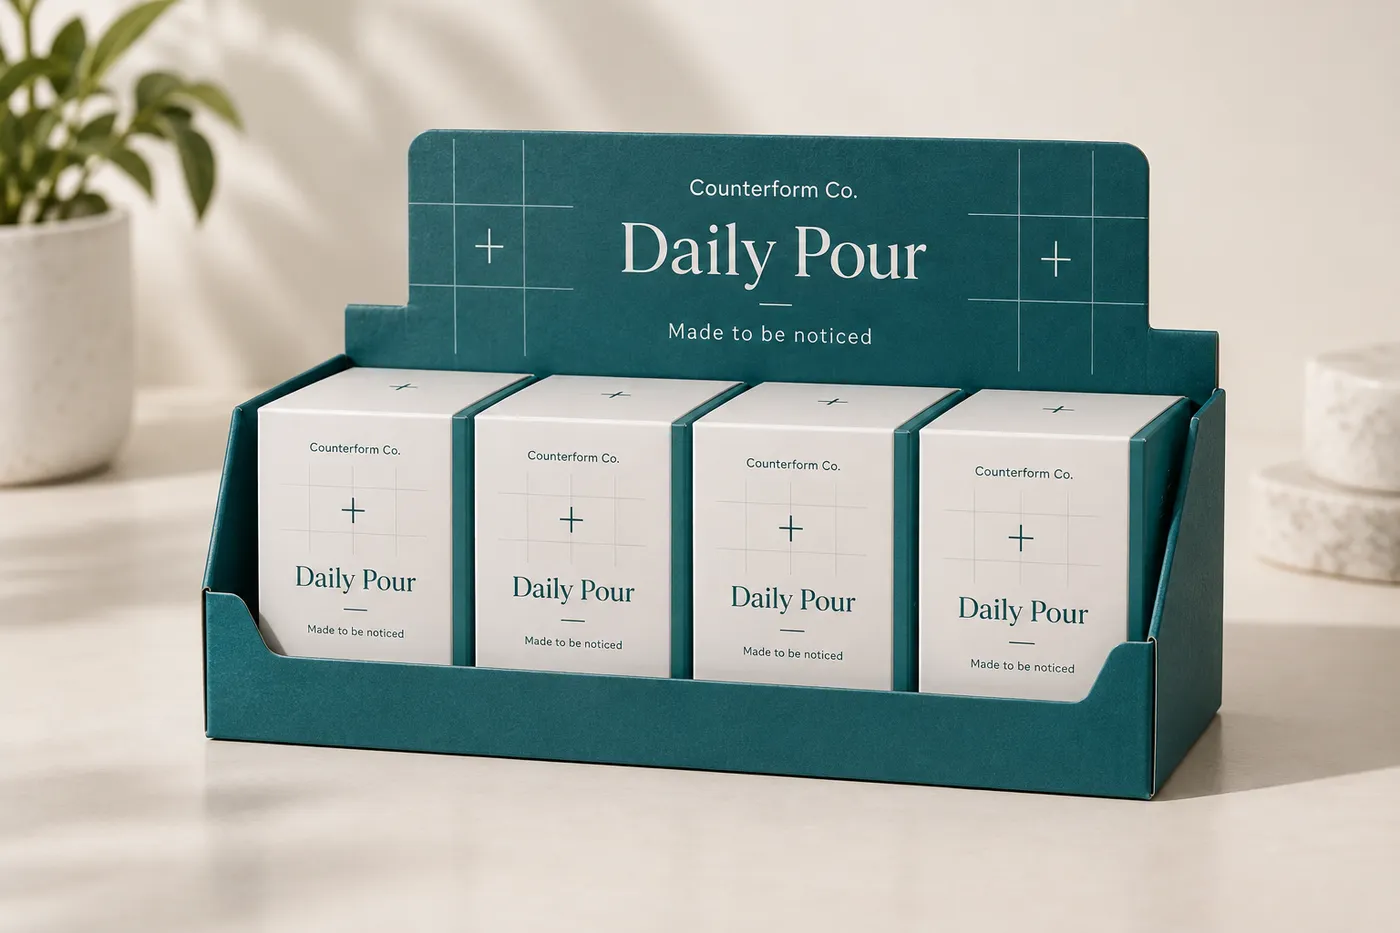
Present a short row of beverage bottles at a counter with a printed header and front opening that keep the label face readable.

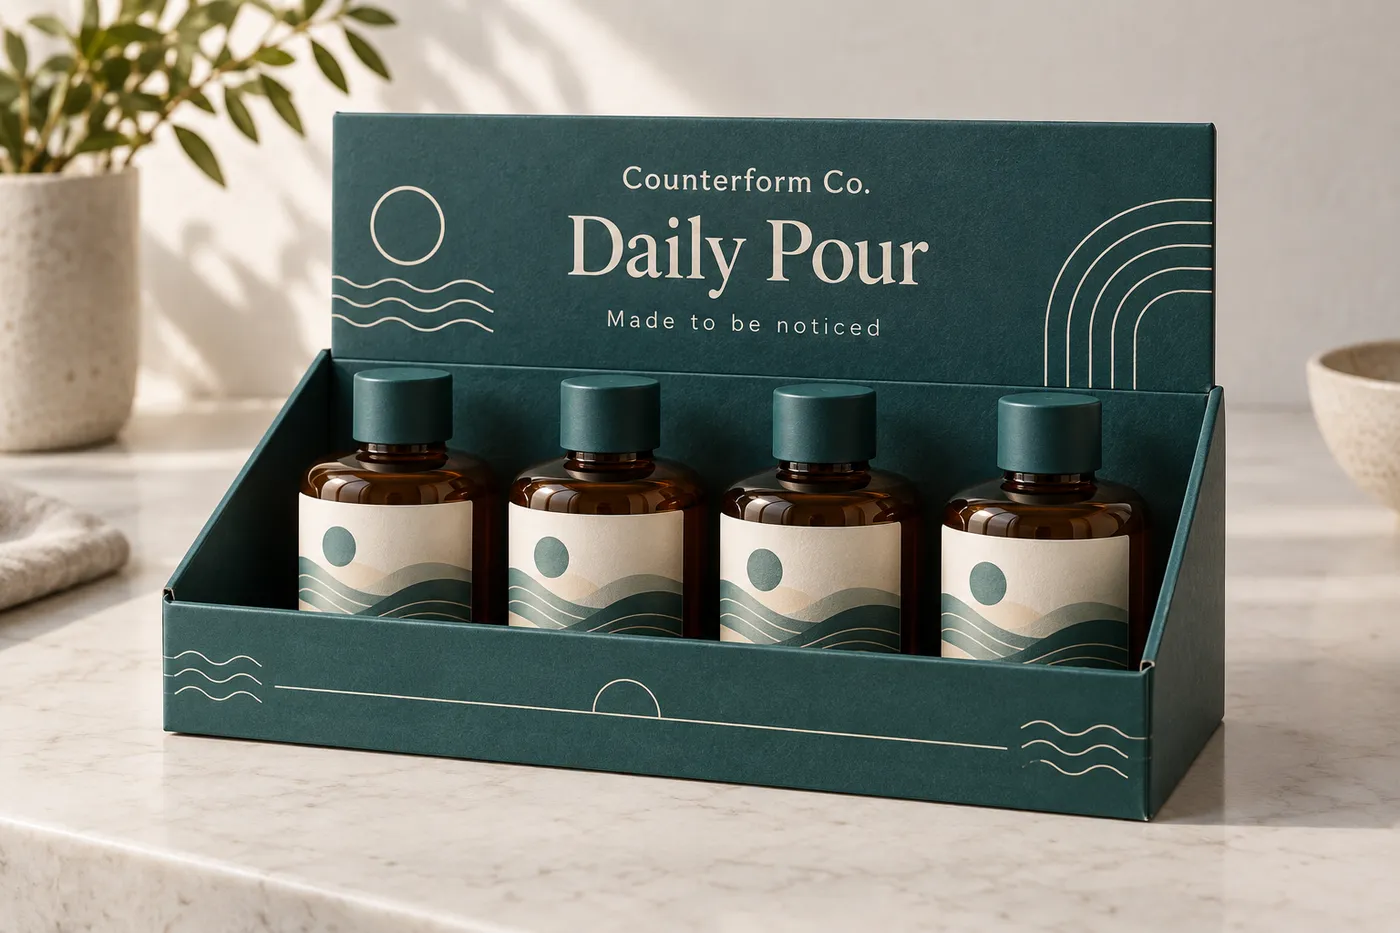
Deep-teal open-front bottle display box with four fictional amber bottles and Counterform Co. header print.
Display Boxes
Bottle display boxes give beverage, cosmetic, wellness, or sample bottles a structured printed presentation at a counter, shelf, or checkout area. The layout can use an open front, raised header, divider, or tear-away access panel, sized around the bottle profile, count, viewing angle, refill routine, and intended handling route.
Last updated
Working quote
Product brief
A bottle display box should keep the bottle label easy to read while giving the retailer a defined place for the brand message. An open-front tray can show the first row without hiding shoulder or cap details; a raised header can carry the campaign name above the products; a perforated front or tear-away access panel can make replenishment easier when staff need to pull one bottle at a time. The display is a presentation and dispensing structure, not a substitute for the bottle, closure, or any required primary pack.
Start with the filled bottle rather than an empty silhouette. Glass and plastic behave differently when a display is moved, and a tall bottle has a different center of gravity from a short jar or sample vial. Share the packed height, widest diameter, neck or cap projection, number of units, and face that should point toward the shopper. If a bottle has a pump, dropper, shrink band, or unusually broad shoulder, include that feature in the brief. A bottle that is 2 units deep may need a different front wall and access opening from one arranged in 3 facings across.
A low front wall suits bottles whose labels need to remain visible, while a slightly taller edge can help organize a rounded or top-heavy format. A raised header creates a vertical printed area for the sample print layout, approved artwork, or a concise product message. A tear-away front or perforated access panel can work when the display also serves as a shipping-ready unit, but the opening should be reviewed against bottle stability and the way the unit travels.
For a single SKU, the base can be arranged in one row or a short group of facings. A mixed display may need dividers so bottles with different heights or labels do not become visually confusing. If the display ships flat and is assembled at the destination, say so early; if it arrives ready to place, the filled weight and handoff from stockroom to counter become part of the construction conversation. A display style is not one universal dieline: a change in bottle diameter, count, header height, or access direction normally calls for its own review.
SBS Paperboard can be considered when a smooth printed face needs small type, a bottle name, or a clean color system. Kraft Paperboard can support a warmer paper character when the artwork uses natural tones. Corrugated Board can be discussed when the display also needs to coordinate with a sturdier shipper or a heavier filled configuration. The category material names are design directions, not a promise of a particular grade, flute, load rating, food-contact approval, or recycling outcome; the selected structure still needs to be matched to the filled bottle and route.
Finishes should serve reading and handling. Matte Lamination may reduce glare on a counter under bright lights, while Gloss Lamination gives selected artwork a more reflective appearance. Spot UV can draw attention to a logo or short message. Embossing/Debossing can add tactile relief, and Foil Stamping can create a focused accent. Each option needs to be checked against artwork, fold positions, exposed edges, and the surface where the display will be read.
Provide the filled bottle height, diameter or width, cap or pump projection, number of units per display, preferred orientation, and any sleeve or label that changes the profile. Note whether bottles are removed from the front, lifted from the top, or replenished from the rear. For a round bottle, describe how it should lean or stand; for a narrow bottle, explain whether a divider or snug lane is needed. A physical sample or clear pack photograph can help the team understand the actual loading sequence.
Compare the display footprint with the available counter or shelf area. A narrow unit with a taller header may read well from a distance but be less suitable where overhead clearance is limited. A wider tray can hold more facings but needs enough base area to remain practical for the fixture. These are specification choices to resolve before the dieline and artwork are finalized; no arbitrary clearance or bottle capacity should be assumed from the product name alone.
Plan artwork panel by panel. The header may carry the strongest brand message, while the front edge and side walls can use quieter supporting graphics. Keep the product name, scent, size, or approved copy in the area that remains visible after loading. The digital proof should show the flat artwork and the assembled presentation so folds, access openings, print placement, and finish areas can be reviewed together.
Replenishment is part of the visual brief. A counter display refilled one bottle at a time can use an accessible front opening, while a unit loaded in batches may benefit from a defined rear or top loading sequence. If the display needs to move between a stockroom and a counter, describe that handoff. The goal is a layout that remains legible as bottles are removed and replaced, without implying a performance certification that has not been confirmed.
The verified minimum order is 50 units. Production is from 7 business days after digital proof approval, and Free US shipping is available on the standard fulfillment path. A $44.99 USD sample kit shipping charge is credited toward the first order. Pricing remains quote-only because the finished footprint, bottle count, board direction, print coverage, finish, and handling route can change the specification.
Send the filled bottle dimensions, unit count, facings, display location, access preference, artwork status, material direction, finish request, and delivery destination. Then review the proposed structure and proof before approval. This sequence gives Easy Box Packaging enough context to discuss whether an open tray, raised header, divider, or tear-away access style best answers the presentation and replenishment brief without claiming that one format fits every bottle.
Proof points
The proof should make the physical and printed decisions visible at the same time. Check the filled bottle, display opening, readable panels, and finish placement before the production path begins.
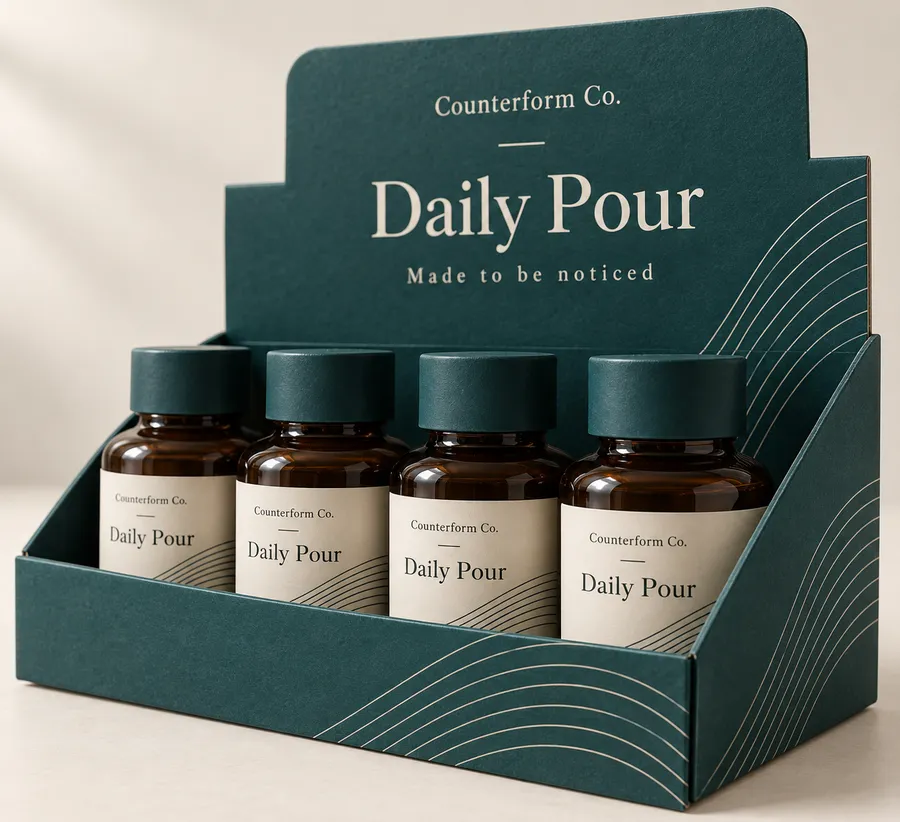
An open-front tray, raised header, divider, or tear-away access panel can be evaluated around the actual bottle profile. The display footprint, facings, refill direction, and printed panel are reviewed together so a counter unit is not treated like a generic shipping carton.
Present a short row of beverage bottles at a counter with a printed header and front opening that keep the label face readable.
Use a compact tray and backer when small bottles need a defined place near a retail or salon counter.
Plan the header, front wall, and facings for the shelf viewing angle, then size the base around the actual bottles.
Change the printed outer message for a promotion or launch while keeping the display structure tied to the same bottle format.
Keep the main bottle and brand message on the panel customers can actually see after loading. The supplied material and finish directions can be compared with the artwork hierarchy, display light, fold positions, and handling context.
The useful brief connects bottle visibility with the way staff load and refill the unit. Three decisions usually set the direction: which label face must stay readable, where the main message belongs, and how the display moves from stockroom to counter or shelf.
Set the front-wall height around the label and cap profile that must remain visible after loading.
Reserve a clear upright panel for the sample print layout or approved brand message without crowding the bottle-facing area.
Choose front, top, or rear access according to the way staff remove and replace bottles during replenishment.
A complete product and fixture brief lets the quote focus on the right display geometry instead of a generic counter silhouette.
Send height, diameter, cap or pump projection, product count, facings, and preferred orientation.
Identify the counter, shelf, checkout, event, or stockroom handoff and the available footprint.
Note front, top, or rear loading, header needs, approved copy, board preference, and finish direction.
Check the flat dieline and assembled display for bottle visibility, access opening, panel placement, and finish areas.
The standard minimum order is 50 units and production is from 7 business days after digital proof approval.
Need help with structure, materials, or production planning? See how we manufacture custom packaging.
A sample kit can help you compare paperboard character, print treatment, front-wall visibility, and the way a filled bottle sits in a display. The kit carries a $44.99 USD shipping charge credited toward your first order.
Shipping charge: $44.99. Credited toward your first order.
Request a Sample KitFind clear answers about fit, materials, and ordering below.
The display can be scoped around beverage bottles, cosmetic bottles, wellness bottles, sample vials, or another defined packaged bottle. The filled profile, unit count, facings, orientation, cap or pump projection, and access route determine the base and header layout; the display does not replace any required primary pack.
An open front keeps the first row easy to see, while a tear-away or perforated access panel can be considered when staff replenish a shipping-ready unit. The best direction depends on how bottles are loaded, removed, and moved between storage and the counter.
The category material directions are SBS Paperboard, Kraft Paperboard, and Corrugated Board. SBS can suit a smooth printed face, Kraft can retain a natural paper character, and Corrugated Board can be discussed for a sturdier configuration. Final suitability depends on the product and handling route.
Send the filled bottle height, diameter, cap or pump projection, number of units, facings, preferred orientation, display footprint, access direction, artwork status, board preference, finish request, and delivery destination. A pack photograph or physical sample can clarify a shoulder, closure, sleeve, or unusual profile.
The standard minimum order is 50 units. Production is from 7 business days after digital proof approval, and the final quote still depends on the display footprint, bottle count, construction, board, print coverage, finish, and destination.
Yes. A sample kit can be requested when you need to compare board appearance, print treatment, front-wall visibility, or the way the filled bottle sits in the display. The kit carries a $44.99 USD shipping charge credited toward your first order.
Orders start at 50 units and scale up to 500,000 for bulk runs, with pricing from $0.38 per unit on larger quantities. Standard production is from 7 business days after digital proof approval.
Compare nearby products and request the format that best fits your next run.
Available product
Available product
Available product
Available product
Display packaging for a defined bottle format
Tell Easy Box Packaging what the display will hold, where it will sit, how staff will replenish it, and which printed panels matter most. We can then review the tray, header, access, board, artwork, and finish as one specification.
Add your product details to see a quote summary.