Single-Bottle Retail Boxes
A fitted cavity keeps one bottle aligned in a printed box while leaving the label and opening sequence visible.

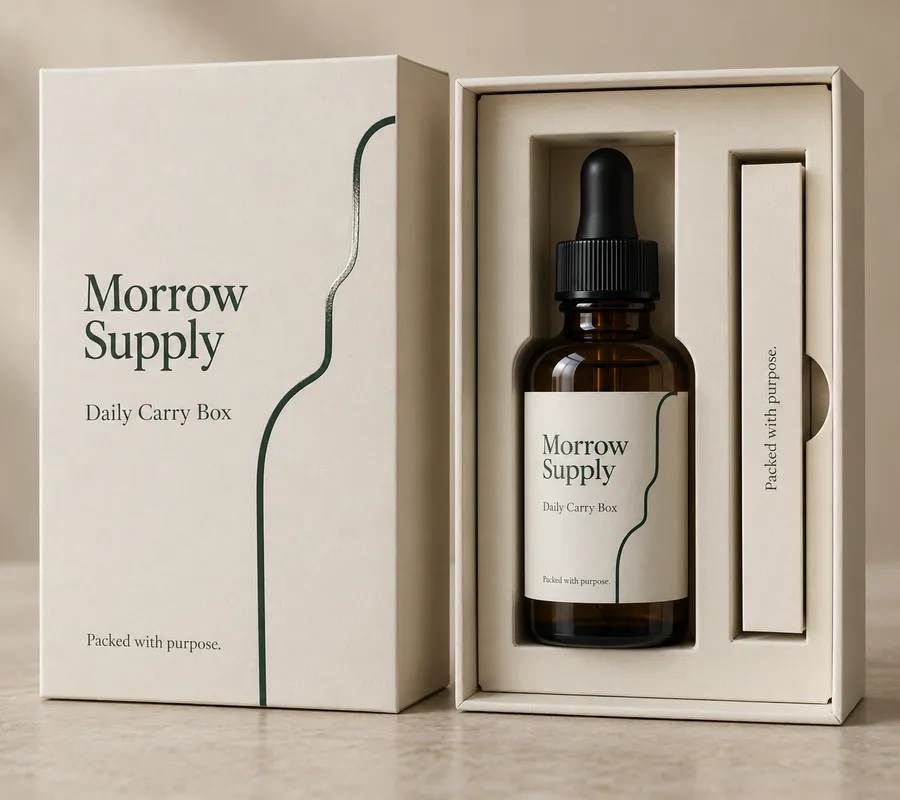
Open printed bottle box with an amber dropper bottle seated in a fitted paperboard insert.
Product Boxes
Custom bottle product inserts are shaped around the finished bottle, cap, label, and any accessory that travels in the product box. Share the packed footprint, weight, orientation, box format, insert material direction, and delivery route so the cavity and presentation can be reviewed around the item you actually sell.
Last updated
Working quote
Product brief
A bottle insert is not a universal tray. It is a fitted component inside a product box, and its useful geometry starts with the bottle in its final selling condition. Measure the bottle with its cap, closure, label, shrink band, sleeve, or overcap in place. Record the finished length, width or diameter, height, packed weight, widest shoulder, base profile, and any part that projects. If a dropper, pump, stopper, carton, card, or sample travels alongside it, include that item in the same layout brief.
The insert also has a job during the handoff. A bottle may stand upright on a retail shelf, lie in a gift box, or travel inside a parcel. Those routes change the clearance, support points, cavity depth, and relationship between the insert and outer box. Explain whether the box is handed over in a store or placed inside another shipper. The insert can then be reviewed as part of the complete package rather than treated as decoration added after the box has already been sized.
Begin with the widest and tallest points of the assembled bottle, not a nominal bottle size. Note the glass or plastic profile, shoulder transition, base ring, cap shape, and the surface that must remain visible. A close cavity can reduce movement, but it still needs enough clearance for the bottle to enter and leave without catching on the insert or printed box panels. If the bottle has a pump or dropper, state whether it must remain upright and which direction the actuator faces.
For more than one component, sketch the order in which the customer sees the bottle, card, sample, or accessory. A divider can keep two bottles apart; a riser can lift a short bottle toward the opening; a shaped collar can hold a narrow neck; and a shared platform can keep a compact set aligned. These are structural directions to review against the actual profile, weight, and box opening. They are not promises of a fixed cavity size before a sample or digital proof has been checked.
Kraft Paperboard, SBS Paperboard, and Corrugated Board are category material directions that may suit different insert jobs. A smooth SBS direction can support small printed instructions or a clean visible edge. Kraft can keep a natural paper character. Corrugated board can be considered when the route calls for a more structured board direction. The correct choice depends on the bottle's weight, the surrounding box, storage, product-to-wall clearance, and whether the insert is primarily a presentation piece or a handling component.
The insert should work with the outer box instead of hiding the bottle label or forcing the lid to bow. Check cavity depth, wall support, edge radii, fold lines, and how the insert seats in the box. If the product is fragile, describe the actual handling route and packed arrangement so support can be discussed honestly; do not treat a generic insert image as proof of drop performance. A second component can also require a divider, pocket, or simple clearance channel rather than a deeper cavity.
Map the product box, insert-facing panel, bottle label, and any instruction card together. The front or lid artwork should still read when the insert is installed, while the insert should not cover a required warning, name, or direction. If the insert is printed, identify the face that the customer sees first and the folds or seams that may interrupt copy. Matte Lamination, Gloss Lamination, Spot UV, Foil Stamping, and Embossing/Debossing are finish directions to review against the selected board and artwork; a finish does not replace a clear structural brief.
The images illustrate how print can sit on the package. Production artwork should use the buyer's approved identity, bottle name, required copy, and regulatory information. Keep the printed mockup consistent across the hero and detail images so a customer can compare the bottle cavity, insert edge, and box opening without confusing the sample with final artwork.
A useful proof shows the assembled bottle, insert, outer box, opening direction, and artwork orientation together. Review the bottle height, cap clearance, cavity fit, insert seating, visible label area, lid relationship, and any divider or accessory pocket. If the bottle dimensions or component count changes, the insert and box should be reviewed again instead of assuming the original dieline still fits.
Orders start at 50 units, production is from 7 business days after digital proof approval, and Free US shipping is included on the standard fulfillment path. A sample kit has a $44.99 USD shipping charge credited toward the first order, and quote requests are typically answered the same business day and always within 24 hours. Pricing remains quote-only because the final unit cost depends on the bottle profile, box format, insert material, print coverage, finish, and quantity.
Send the finished bottle length, width or diameter, height, weight, cap or pump details, label orientation, accessory list, box interior, quantity, artwork status, preferred material direction, finish ideas, and destination. Add side and top photographs or a simple sketch when the shoulder, base, or closure is irregular. State whether the package is shelf-facing, handed over as a gift, or placed inside a shipping carton.
That information lets a reviewer connect the cavity, support points, insert edge, printed panels, and delivery route before the structure is approved. The result is a bottle product insert designed around the actual product rather than a generic tray that leaves movement, hidden artwork, or an awkward opening for the customer to discover.
Proof points
The finished insert is reviewed as a fitted component inside the product box, with its cavity, support, printed surfaces, and opening relationship considered together.
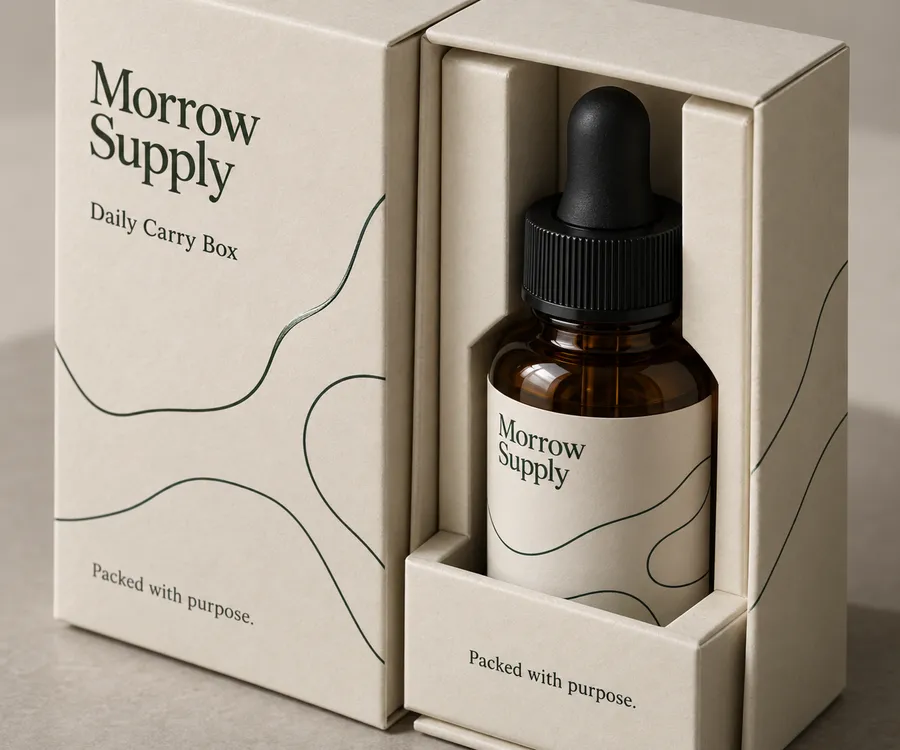
Sizing begins with the finished bottle and every component that travels in the box. The insert is then reviewed around the bottle's widest point, cap or pump clearance, orientation, weight, cavity depth, support points, and the outer box opening.
A fitted cavity keeps one bottle aligned in a printed box while leaving the label and opening sequence visible.
A divider, pocket, or shared platform can organize a bottle with a card, sample, dropper, or small accessory.
A raised or shaped support can frame the bottle when the box remains visible during handover.
The insert can be reviewed with the outer shipping pack and route when the bottle travels through parcel handling.
Artwork is mapped to the assembled box and insert so the bottle label, instructions, folds, cavity edge, and opening remain intentional after assembly.
A clear brief connects the product profile to the insert, printed box, and delivery route so the quote can be reviewed around a real packed arrangement.
Share the finished length, width or diameter, height, weight, shoulder, base, cap, pump, label, and any sleeve or seal that stays on the bottle.
List every card, sample, accessory, or second bottle and show which face should be visible when the box opens.
Explain the product box interior, opening direction, shelf or gift handoff, and whether the package travels inside another shipper.
The order path turns the bottle profile and box brief into a reviewed insert structure, printed layout, and production-ready proof.
Provide finished dimensions, weight, widest points, cap or pump shape, label orientation, and any sleeve or seal.
Describe cards, samples, accessories, or second bottles and explain the desired opening order.
Explain whether the box is shelf-facing, handed over as a gift, or placed inside another shipping carton.
Discuss Kraft Paperboard, SBS Paperboard, or Corrugated Board with the intended print and finish treatment.
Check cavity fit, cap clearance, visible label area, folds, seams, box opening, and finish coverage against the actual bottle.
Need help with structure, materials, or production planning? See how we manufacture custom packaging.
Review board feel, cavity relationship, printed surface, and box opening before a full run; the $44.99 USD sample-kit shipping charge is credited toward the first order.
Shipping charge: $44.99. Credited toward your first order.
Request a Sample KitFind clear answers about fit, materials, and ordering below.
Measure the finished bottle with its cap, pump, label, sleeve, or seal in place. Share length, width or diameter, height, weight, widest points, orientation, and any accessory that remains in the box so the cavity can be reviewed around the complete packed arrangement.
Kraft Paperboard, SBS Paperboard, and Corrugated Board are category material directions. The suitable direction depends on the bottle profile, weight, printed surface, box structure, storage, and delivery route.
Yes, when the components and opening order are clear. A divider, collar, riser, pocket, or shared platform may be reviewed depending on the bottle geometry and the accessory layout.
The standard fulfillment path starts at 50 units. Production begins from 7 business days after digital proof approval, and free US shipping is included.
Send bottle dimensions and weight, cap or pump details, label orientation, box interior, component list, quantity, artwork status, preferred material or finish, and destination. Side and top photos help clarify irregular shoulders or bases.
Orders start at 50 units and scale up to 500,000 for bulk runs, with pricing from $0.17 per unit on larger quantities. Standard production is from 7 business days after digital proof approval.
Yes. Free US shipping is included on the standard fulfillment path. Delivery timing and carrier details are confirmed when your quote is prepared.
Compare nearby products and request the format that best fits your next run.
Available product
Available product
Available product
Available product
Get Started
Send the bottle dimensions, weight, cap or pump details, box interior, component list, quantity, artwork status, and handling route to request a quote.
Add your product details to see a quote summary.