Takeaway fries
A printed pouch can carry the product cue and serving information for a short-cycle handoff when the filled shape and opening route are supplied.

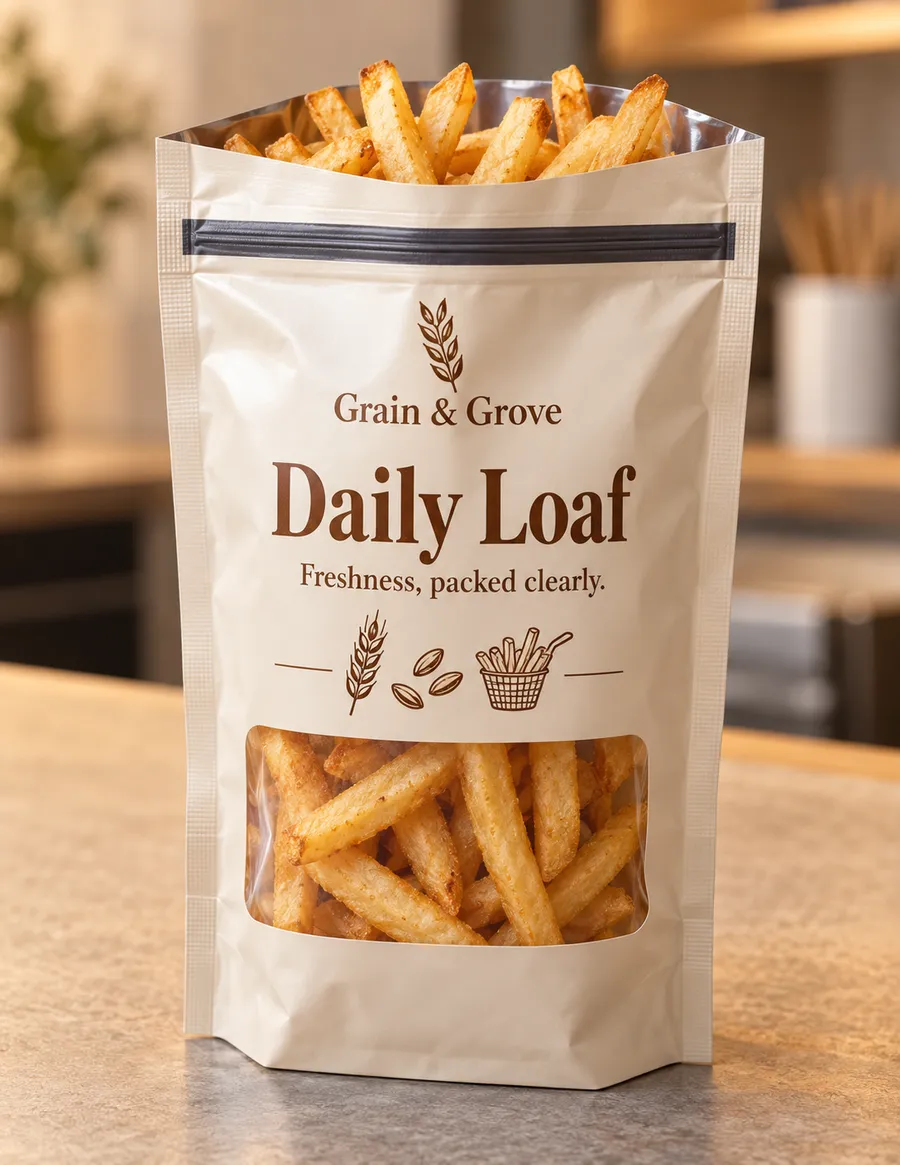
Printed warm ivory fry bag with a zipper, clear window, and golden fries inside.
Custom Mylar Bags
Custom fry pouches give fries and other fried snacks a printable flexible pouch format with film, barrier, closure, and finish choices mapped to the filled portion. Choose a flat or gusseted profile, a zipper or heat-seal route, and artwork coverage that keeps the product cue, storage guidance, and required information readable. Share the portion weight, packed shape, serving routine, and artwork status for a quote-ready review.
Last updated
Working quote
Product brief
Fry pouches give a food brand a printable flexible format for fries, seasoned potato snacks, fried onions, plantain chips, and similar dry or short-cycle products. The useful starting point is the portion as it will actually be packed: length, width, height, widest points, fill weight, temperature at filling, and whether the bag is handed over immediately or stored for later use. A flat pouch may suit a small serving or sampler, while a gusseted stand-up bag can provide more room for a larger portion and a visible front panel. The finished shape influences the opening, seal area, artwork map, and how the contents settle after filling.
Fried products can carry oil, seasoning, heat, and crumbs into the closure area, so the film and seal conversation should be based on the product and filling routine. Food-grade flexible pouch film can be paired with a metalized or foil barrier laminate when moisture, aroma, oxygen, or light needs a considered response. A polyethylene sealant film can support a heat-seal route, while a zipper can make a larger snack pouch practical for repeat opening. These are construction directions to review, not a universal freshness or grease-proof promise. Share the cooking or cooling state at filling, the storage route, and whether the bag will sit in a display, travel in a delivery order, or be opened immediately.
A quote brief should identify the finished width, height, gusset or depth, seal area, and opening edge. Include the portion weight and the way fries or snacks lie in the filled bag. A tall front panel can make the product cue easy to see; a bottom gusset can help the pouch stand for display; a flat format can reduce bulk for short-cycle takeaway use. The final allowance is confirmed during specification and dieline review, so do not substitute an arbitrary clearance for the filled dimensions. If a vent, window, tear notch, hang hole, or carry feature is requested, name it before the structure is finalized.
The closure should match the customer routine. A top heat seal can suit a bag closed after filling, while a tear notch can make first opening easier. A zipper can support repeated access when a portion is stored after opening. Seal width, zipper position, gusset folds, and crumb or seasoning exposure should be reviewed together. If the bag is filled while the product is warm, say so; if it is filled after cooling, provide that detail as well. The filling method can change the practical seal-safe area and the way important copy sits on the front or back panel.
Use the front for the brand cue, product name, flavor or seasoning, portion description, and a simple serving message. The back can carry ingredients, allergen information, preparation or storage guidance, barcode placement, lot coding, and required business details. Keep critical copy away from the zipper track, top crimp, gusset fold, window edge, and any tear feature. A clear window can be considered when product visibility matters, but its position should be checked against light and barrier requirements rather than added by default.
Matte lamination can give a restrained surface for a food illustration, gloss lamination can provide a brighter reflective direction, and spot gloss, spot UV, metallic ink, or a foil accent can identify a selected logo detail. Finish choice may interact with the barrier film, ink coverage, folds, and artwork scale, so the digital proof is the right place to check the final print map. The pictured print is an example of artwork placement, and your approved brand artwork takes its place once the proof is signed off.
The standard fulfillment path starts at 50 units, with production from 7 business days after digital proof approval. Free US shipping is an approved service fact for the standard path, and dieline and proof review are included at no extra charge. Quote replies are typically returned the same business day and always within 24 hours. Pricing remains quote-only because the film, portion size, closure, print coverage, finish, quantity, and destination change the actual recommendation and cost.
For a useful quote, send a filled sample or measured dummy, portion weight, packed dimensions, product temperature at filling, storage route, opening frequency, artwork status, and destination. Note whether the bag is for a takeaway handoff, delivery order, retail shelf, or pantry storage. A sample kit has a $44.99 USD shipping charge credited toward the first order, which can help compare film feel, opacity, seal behavior, and finish direction before approving a custom run.
Mark the intended front panel, reading direction, seal-safe zones, barcode or lot area, and any no-print areas in the artwork brief. Show the complete filled arrangement instead of one loose fry or snack. If the product is sold as a 100 g serving or another measured portion, provide the canonical quantity and how the contents settle; those details influence the pouch profile and headspace. Avoid placing important copy where oil, seasoning, folds, or the closure could make it harder to read.
Also explain the fulfillment context. A bag that goes directly into a customer's hands may need a different opening conversation from one that travels through parcel shipping or sits in a retail display. Stacking, vibration, repeated handling, and the time between filling and opening can affect the practical value of a gusset, tear notch, zipper, or top seal. The final recommendation should balance the filled geometry, barrier direction, print readability, fill speed, and customer opening behavior. No single fry pouch format is correct for every fried snack; a clear brief lets the dieline and proof resolve the variables before production.
Proof points
The proof should show the filled fry pouch and artwork on the assembled pack. Compare the closure, seal margin, panel orientation, barrier direction, window or gusset, and finish placement with the serving brief.
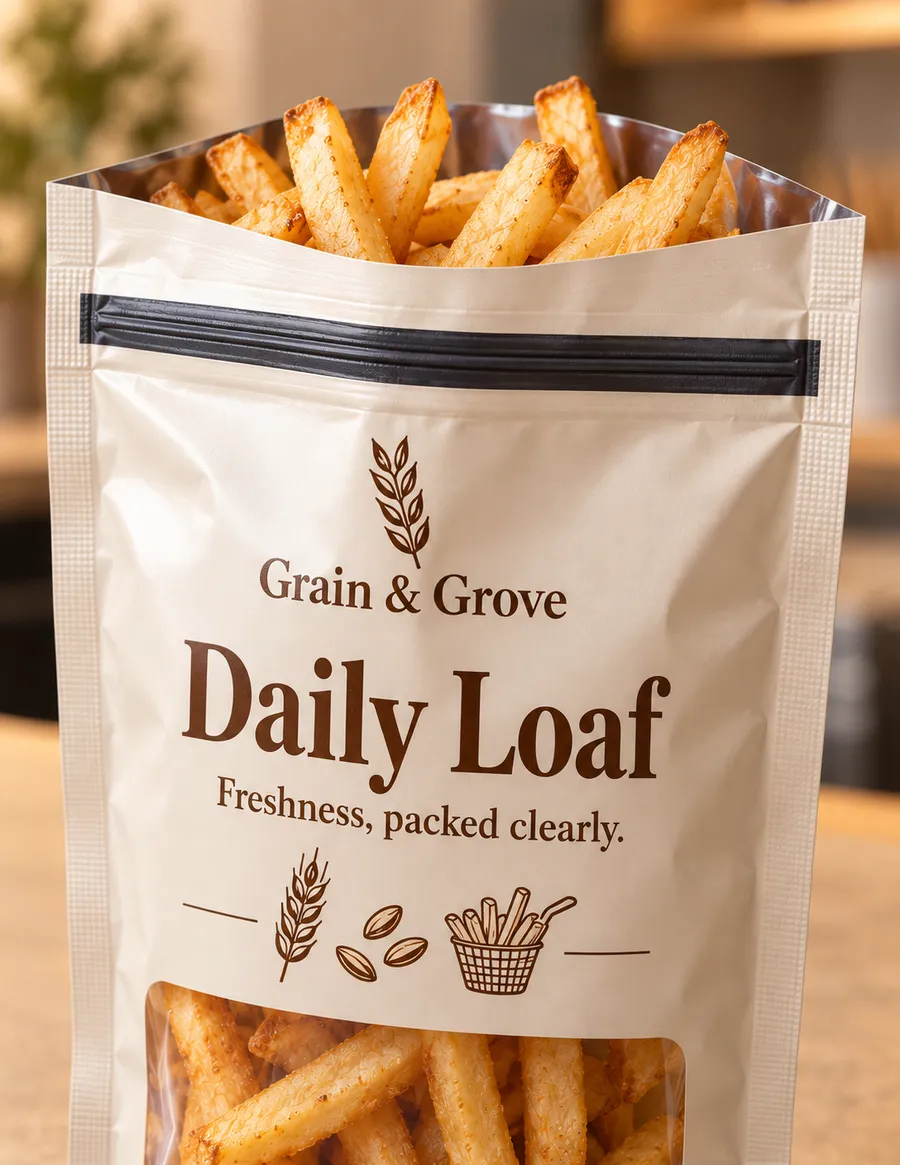
Start with the filled portion and the moment of use. Film, barrier, closure, seal margin, gusset, and printed panels should support the serving routine while keeping the product cue and required information easy to read.
A printed pouch can carry the product cue and serving information for a short-cycle handoff when the filled shape and opening route are supplied.
A gusseted format can give a measured portion room to settle while the front panel carries flavor, ingredient, and handling guidance.
A barrier and closure review can be planned around crispness concerns, portion size, light exposure, and whether the customer will reopen the bag.
The fill method, seasoning at the seal, food-contact film, and closure should be reviewed together before the pouch profile is finalized.
Map artwork on the filled pouch so the brand, flavor, serving cue, allergen information, lot area, and required details remain readable when the bag is sealed, folded, or held.
The bag is reviewed as a filled food package, not as a flat artwork file. Profile, barrier, closure, and finish depend on portion weight, product temperature, seasoning, storage route, and opening routine.
Use packed length, width, height, widest points, portion weight, headspace, and any inner wrap to set the pouch profile and seal area.
A tear notch, zipper, or heat seal can be considered around whether the bag is handed over warm, stored after opening, or resealed between servings.
Place brand, flavor, ingredient, allergen, barcode, lot, and storage copy away from folds, zipper tracks, seasoning-prone crimp zones, and tear features.
A useful quote starts with the filled portion and the way the customer will receive, open, and store it. These steps turn that routine into a pouch specification that can be checked before production.
Provide packed length, width, height, widest points, portion weight, product format, temperature at filling, and any inner wrap.
State whether the bag needs a zipper, tear notch, heat seal, window, gusset, or simple top seal, and how often it will be reopened.
Mark front, back, gusset, seal, zipper, barcode, allergen, lot, handling, and no-print zones in the artwork or brief.
Check film direction, pouch profile, barrier, closure position, seal margin, print orientation, and finish placement on a filled-pack proof.
Need help with structure, materials, or production planning? See how we manufacture custom packaging.
A sample kit carries a $44.99 USD shipping charge credited toward your first order, useful when you need to compare film feel, opacity, seal behavior, and finish direction before approving a custom fry pouch.
Shipping charge: $44.99. Credited toward your first order.
Request a Sample KitFind clear answers about fit, materials, and ordering below.
Send the packed length, width, height, widest points, portion weight, product format, headspace, and any inner wrap. Include temperature at filling, storage conditions, seasoning, and how customers will receive, open, and store the product.
It depends on the routine. A top heat seal can suit a bag closed after filling, a tear notch can support first opening, and a zipper can help when a larger snack portion will be reopened. The final route should be reviewed with the filled product.
Yes, artwork can be mapped across front, back, gusset, window, and selected seal-safe zones. Keep ingredients, allergen information, barcode placement, lot details, and other important copy away from folds, zipper tracks, and the top crimp.
No universal freshness or grease-resistance result should be assumed. Film and barrier selection depend on the product, oil and seasoning, moisture, temperature at filling, light exposure, closure, and storage route, so those variables should be reviewed with the actual snack.
The standard fulfillment path starts at 50 units. Production starts from 7 business days after digital proof approval; the final schedule is confirmed with the quote and proof.
Orders start at 50 units and scale up to 500,000 for bulk runs, with pricing from $0.38 per unit on larger quantities. Standard production is from 7 business days after digital proof approval.
Common uses include takeaway fries, seasoned potato snacks, plantain or vegetable chips, and fried onions and dry toppings. The final specification is set by the packed product and how it will be handled.
Compare nearby products and request the format that best fits your next run.
Available product
Available product
Available product
Available product
Plan the right fry pouch
Send the product type, filled dimensions, portion weight, temperature at filling, handoff routine, closure preference, artwork status, and finish direction. Easy Box Packaging can then review the film, barrier, pouch profile, seal-safe print map, and proof as one quote-ready specification.
Add your product details to see a quote summary.