Single-product retail presentation
A printed sleeve can frame one bottle, jar, carton, or similarly defined item while the die-cut tray controls its position during opening.

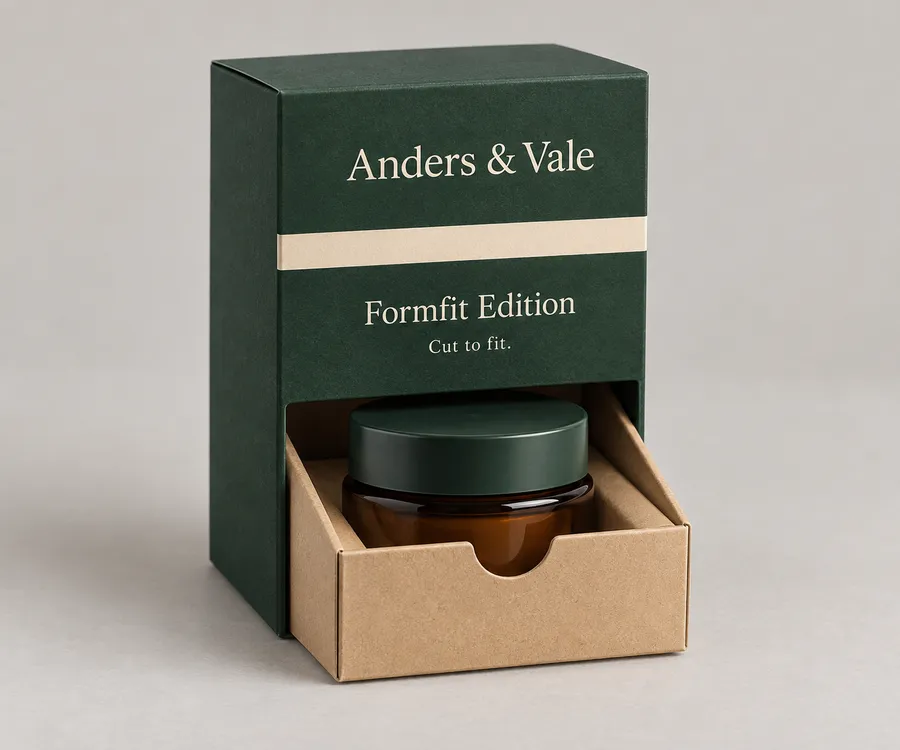
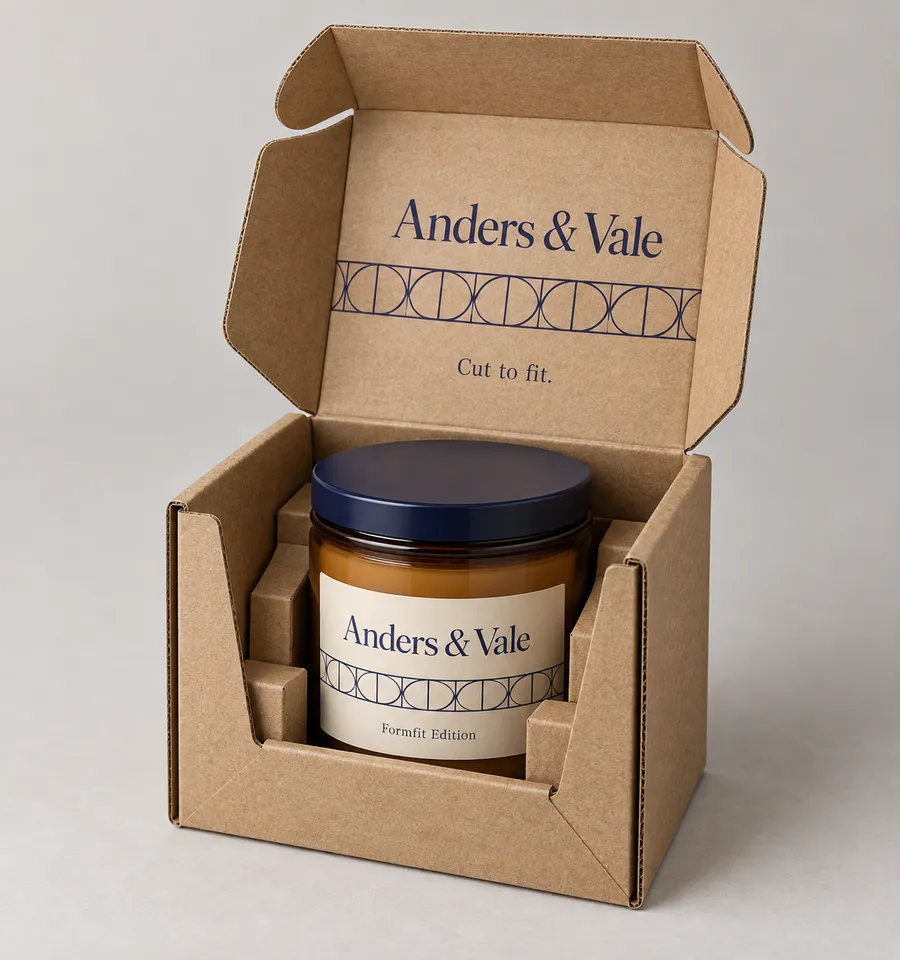
Die-cut sleeve box with a printed outer sleeve and tray holding an amber cosmetic jar
Die-Cut Boxes
Custom die cut sleeve boxes pair a printed paperboard sleeve with a die-cut inner tray shaped around a product or small set. The sleeve controls the outside presentation, while the tray helps position the contents during packing and opening. Sizing, board direction, cut features, print, and finish are reviewed around the actual packed product.
Last updated
Working quote
Product brief
A custom die cut sleeve box separates two jobs that are often forced into one carton: the outer sleeve carries the printed presentation, and the inner tray creates the product-facing structure. That division gives a brand owner a clear decision to make. The sleeve can be planned around the visible front, side, and pull direction, while the tray can be shaped around the product's outline, orientation, and desired reveal. The result is useful for a single item or a small set that needs a defined place inside the package without relying on a standard rectangular interior.
The tray slides into the printed sleeve and gives the package its opening rhythm. A shallow tray can present the product as it is pulled out, while a deeper or more shaped tray can create a defined cavity around a particular item. The sleeve itself may be open at one end, closed with a stop, or arranged around a tray that slides from the chosen direction. Those choices affect the panel layout, the hand position used to open the box, and how much of the product is visible before it is removed. The construction is therefore reviewed as one moving assembly, not as a printed sleeve with an unrelated insert.
Start with the packed product, not the product category name. Provide length, width, and height after any primary wrap, label, cap, or secondary pack that will travel inside the sleeve box. Note the widest point, any shoulder or corner that changes the outline, the intended orientation, and the number of items in the tray. If a small set will be packed together, show the arrangement rather than adding the individual item dimensions and assuming the set will fit. The tray cut and the sleeve opening need to be considered together, because a product that fits the cavity can still interfere with the pull direction or the visible reveal.
SBS Paperboard offers a smooth printed surface for a sleeve where artwork, product information, and panel alignment need to read clearly across folds. Kraft Paperboard can shift the visual character toward a natural paper surface, while Corrugated Board can be considered when the package needs a more substantial board structure for its handling route. The appropriate material depends on the product geometry, the tray design, the sleeve span, the intended presentation, and the way the packed unit will be handled. A material direction is selected with the dieline and artwork rather than treated as a universal answer for every sleeve box.
The sleeve has a practical print area and a moving relationship with the tray. Keep key brand text away from edges that disappear into the sleeve or rub against the tray during opening. Foil Stamping can highlight selected lettering or linework, Matte Lamination can change the surface appearance and handling feel, and Spot UV can create localized gloss contrast on chosen artwork. Each finish remains subject to artwork review near folds, cut edges, small text, and the sleeve opening. The tray can carry a quieter interior print direction or a short message if that supports the intended reveal, but its artwork should be positioned with the cavity and fold geometry in mind.
The die-cut tray is not sized from weight alone. Product geometry, weight, fragility, orientation, sleeve clearance, fulfillment handling, and the desired reveal all affect the support decision. Support may be integrated into the tray with shaped walls, tabs, or a defined cavity, or it may be supplied as a separate paperboard component when the structure and presentation call for another layer. The exact arrangement is confirmed from the real product and the way it needs to sit inside the sleeve, so the quote request should include a product image or drawing when the outline is unusual.
A different product height, cavity outline, tray arrangement, sleeve opening, or closing feature can change the dieline even when the overall sleeve-box style remains recognizable. A new size is therefore treated as a new specification to review, not as a simple scaling exercise. Artwork also needs to be checked against the assembled position: a front-panel wordmark may move relative to the tray, a side panel may become hidden inside the sleeve, and a finish accent may approach a fold or cut. The digital proof is the point where those relationships can be checked before approval.
Send the packed dimensions, product count, orientation, approximate weight, preferred material direction, artwork status, finish preference, and delivery destination. Include a sketch or photo if the product has a shoulder, taper, handle, unusual corner, or other feature that changes the cavity. Dieline and digital proof review are included at no extra charge. The standard minimum order is 50 units, and production runs from 7 business days after digital proof approval. A quoted order can begin at 50 units on the standard path. Quote requests are typically answered the same business day, always within 24 hours. Pricing remains quote-only because the tray cut, sleeve size, board direction, print coverage, and finish are specific to the order.
Proof points
The useful proof points are the physical relationships that determine how the box feels in the hand. A printed sleeve needs enough panel continuity for the artwork to read across its outside faces, while the die-cut tray needs a cavity and wall arrangement that suits the product's outline. The opening end, pull direction, tray stop, and any internal tab are considered with the packed product and the expected handling route.
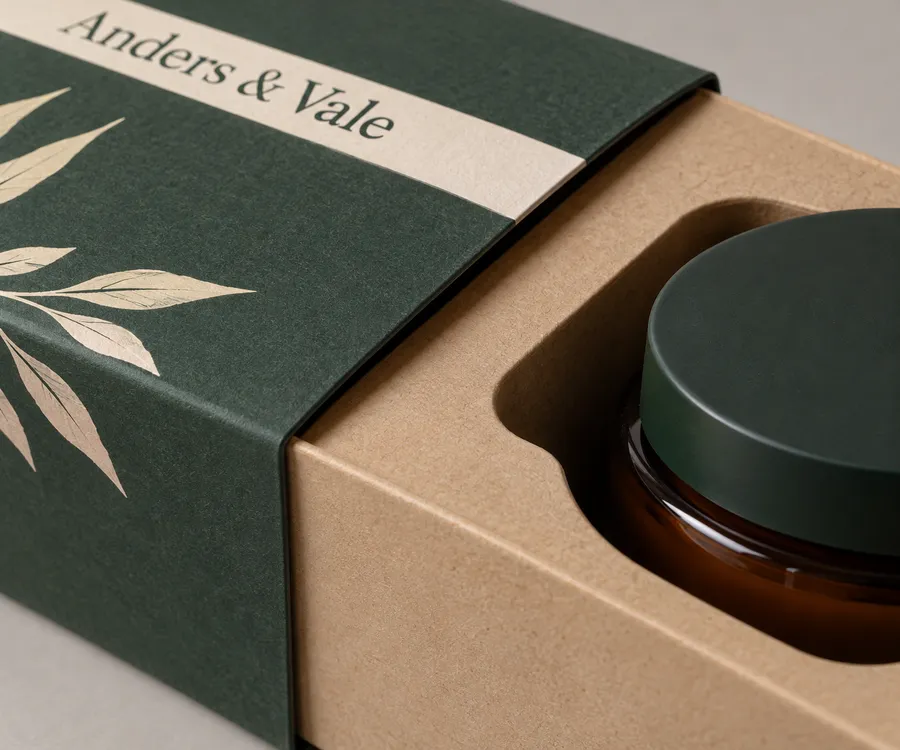
The sleeve and inner tray are designed as one opening sequence. The printed sleeve can frame the front and side panels while the tray slides out from the chosen end, giving the product a defined reveal instead of asking the customer to lift a loose lid. Share the packed product orientation, the preferred pull direction, and the amount of the product you want visible at first opening. A single compact item may suit a shallow shaped tray; a small set may need separated positions or a different reveal arrangement. The final sleeve overlap, stop, and tray geometry are confirmed during dieline review so the assembled pieces work together.
A printed sleeve can frame one bottle, jar, carton, or similarly defined item while the die-cut tray controls its position during opening.
A shaped tray can give several coordinated items their own positions when the set arrangement and reveal order are known.
A tray-and-sleeve format can organize one repeatable packed configuration while keeping the outer artwork easy to identify.
The sliding opening can make the first reveal part of the package interaction without adding a separate lid or hardware component.
The sleeve offers several visible faces, but its artwork must be planned around the overlap and the point where the tray enters. Foil Stamping can highlight selected lettering or linework, Matte Lamination can provide a lower-sheen surface direction, and Spot UV can add localized gloss contrast on chosen areas. Check the artwork against the sleeve overlap, folds, opening edge, small type, and any tray print so the assembled package reads as one design. The selected finish combination remains subject to artwork review.
The review covers the moving relationship between the sleeve and tray, not just the printed artwork. Dieline and digital proof review are included at no extra charge, so the opening end, tray position, panel visibility, and finish placement can be checked together. The approved standard estimate begins from 7 business days after digital proof approval. A sample kit can also help you inspect board feel and printed finish direction before committing to the full run.
The pull direction, sleeve overlap, tray stop, cavity position, and visible reveal are reviewed as one assembled package.
The cut, folds, artwork placement, and finish accents are checked before the proof is approved for production.
Request a sample kit to examine paperboard surface, tray construction, and print direction before ordering.
A useful quote starts with the packed arrangement and the intended opening. Send the product dimensions, item count, orientation, approximate weight, preferred material, artwork status, finish direction, and delivery destination so the sleeve and tray can be scoped as one package.
Provide the packed length, width, height, product outline, item count, orientation, and any shoulder, taper, or corner that changes the cavity.
State which end should open, how much of the product should show first, and whether the tray needs a stop, tab, or shaped reveal.
Share any preference for SBS Paperboard, Kraft Paperboard, Corrugated Board, Foil Stamping, Matte Lamination, or Spot UV.
Send the available artwork or note that the artwork is still being prepared for the sleeve and tray panels.
Check the sleeve overlap, tray cavity, opening direction, panel visibility, folds, and finish placement together.
Need help with structure, materials, or production planning? See how we manufacture custom packaging.
Request a sample kit to inspect paperboard surface, sleeve construction, tray feel, and printed finish direction before committing to a full run. The sample kit carries a $44.99 USD shipping charge credited toward your first order.
Shipping charge: $44.99. Credited toward your first order.
Request a Sample KitFind clear answers about fit, materials, and ordering below.
It is a two-part package with a printed outer sleeve and a die-cut inner tray. The sleeve carries the visible outside artwork, while the tray is shaped around the product or set so the opening and presentation can be planned together.
Share the packed length, width, and height, the product outline, item count, orientation, approximate weight, and any feature such as a shoulder, taper, cap, or unusual corner that changes the cavity. Include the intended pull direction as well.
It can be scoped for a small set when the item arrangement, orientation, desired reveal, and tray support are known. The items may need separated positions or another internal structure, so send the assembled set rather than only the individual product measurements.
SBS Paperboard, Kraft Paperboard, and Corrugated Board are material directions in this category. Finish directions include Foil Stamping, Matte Lamination, and Spot UV, with the final combination reviewed against the sleeve overlap, tray, folds, cut edges, and artwork.
A sleeve box is normally planned as a sleeve-and-tray construction because the tray creates the product-facing reveal. The tray may be shallow, shaped, or divided depending on the product geometry, item count, orientation, and presentation requirement.
The standard minimum order is 50 units. Production runs from 7 business days after digital proof approval, and quote requests are typically answered the same business day, always within 24 hours. Your final unit price is confirmed in a quote because the sleeve size, tray cut, board direction, print coverage, and finish are specific to the order.
Orders start at 50 units and scale up to 500,000 for bulk runs, with pricing from $0.26 per unit on larger quantities. Standard production is from 7 business days after digital proof approval.
Compare nearby products and request the format that best fits your next run.
Available product
Available product
Available product
Available product
Plan the sleeve and tray
Send the packed dimensions, product arrangement, opening preference, artwork status, material direction, and finish preference to start a quote for custom die cut sleeve boxes.
Add your product details to see a quote summary.