Product labels
A shaped printed label for a carton, jar, insert, or other reviewed surface where the artwork contour is part of the identity.

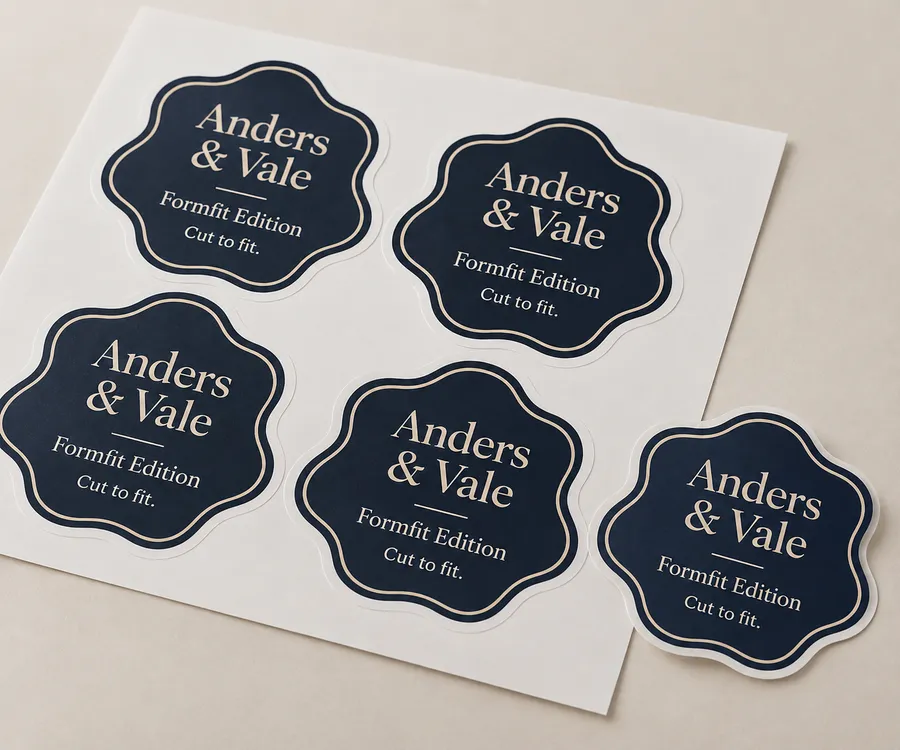
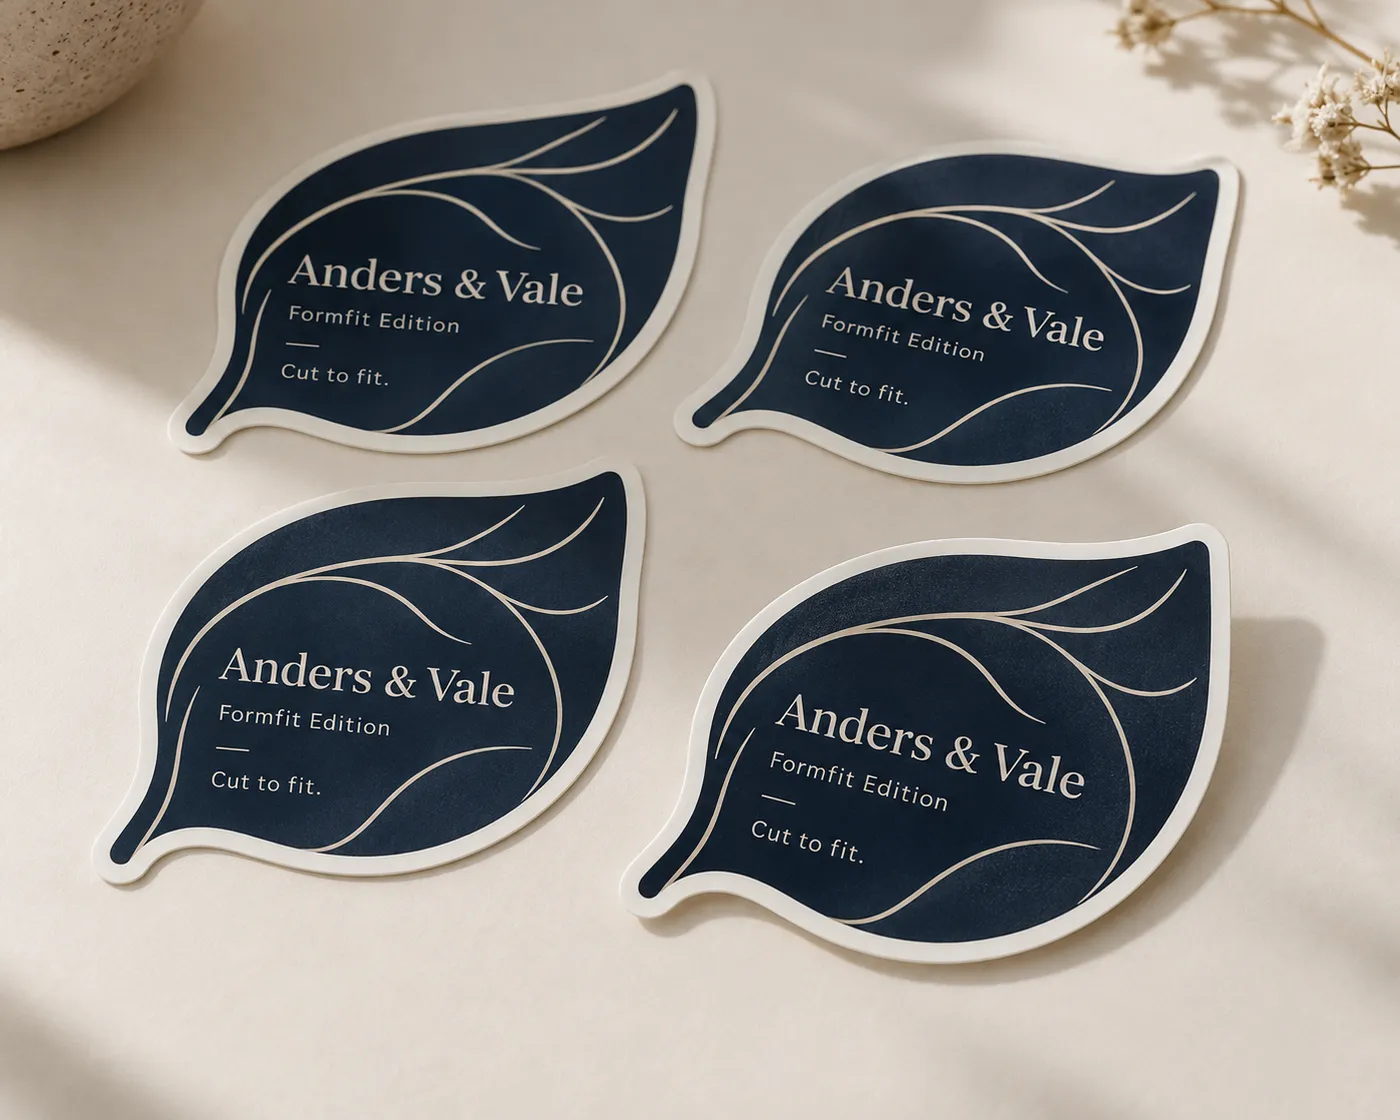
Individual custom die cut stickers with deep navy artwork on a white release liner
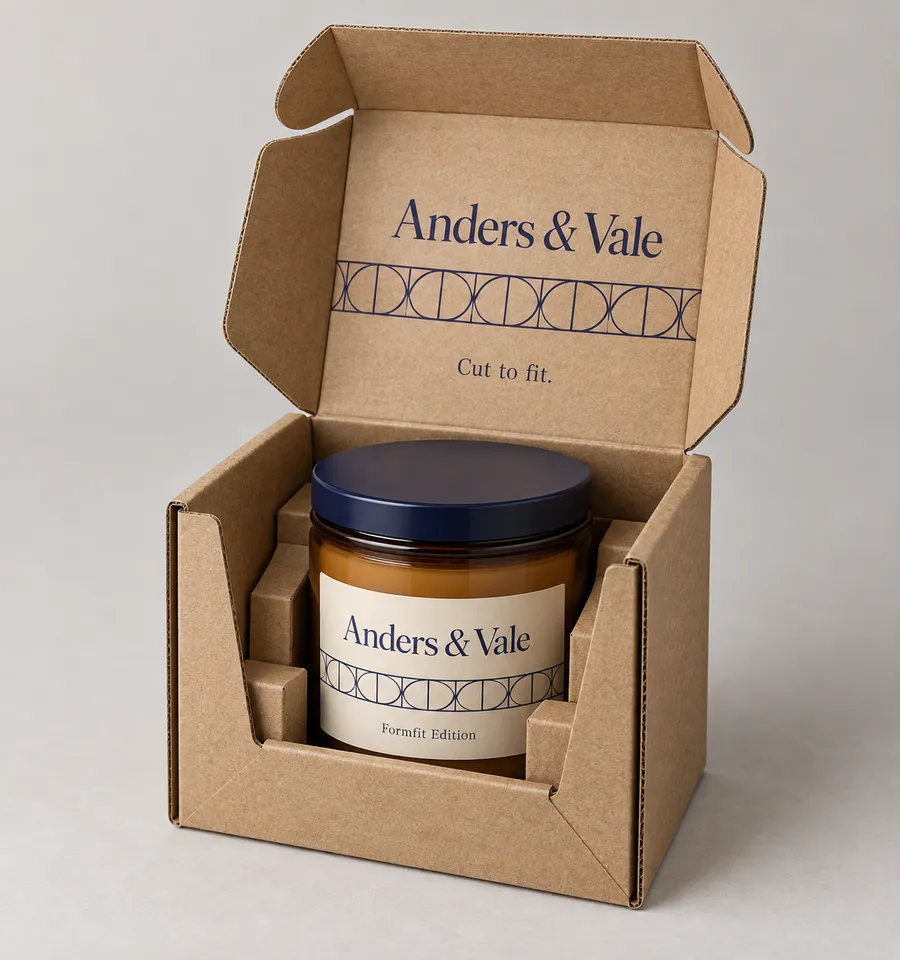
Die-Cut Boxes
Custom die cut stickers follow the supplied artwork contour instead of defaulting to a rectangle. They can be specified as separate pieces or another reviewed presentation format for product labels, package seals, inserts, events, and retail details. Finished size, face stock, adhesive direction, print coverage, and surface treatment are considered together before the digital proof.
Last updated
Working quote
Product brief
Custom die cut stickers give a printed adhesive piece a defined outer shape, so the contour can follow a mark, character, badge, seal, or other artwork instead of leaving a standard rectangular border. The useful starting point is the application. A sticker applied to a carton, used as a package seal, packed with an order, handed out at an event, or placed on a retail display can require different decisions about face stock, adhesive direction, handling, and finish. Describe that job before choosing a final cut path.
The format can be supplied as individual pieces or another presentation format that fits the way the stickers will be received and applied. That distinction matters because a loose stack, a continuous roll, and a sheet with multiple designs are handled differently. The quote should identify whether one contour repeats, several designs are included, or the pieces need to remain separate. The intended method of application also helps the team review the release liner, peel edge, and visual orientation as part of the same specification.
The cut line should preserve the part of the design that makes the sticker recognizable while keeping the outer edge practical to review and produce. Provide the finished artwork or a clear outline, including any open spaces, pointed corners, narrow bridges, tabs, notches, or small interior cutouts. A rounded badge and an illustrated character may both be called custom stickers, but they place different demands on the contour and the visible border.
Share the widest and tallest points of an irregular design, the preferred finished width and height, and any edge that should remain visually dominant. If an existing sample or outline drawing shows the intended shape, include it with the artwork. The digital proof is where the cut path, artwork placement, border, and selected surface treatment are checked together. A change to the artwork contour or application surface after proof approval should be reviewed again because it can change the specification.
The receiving surface affects how the sticker brief should be evaluated. A smooth carton, coated insert, glass jar, shipping box, or event handout can present different questions about face stock, adhesive behavior, surface texture, and removal. Include whether the sticker will be applied by hand, placed with another product, distributed separately, or used as a seal. If the surface is curved, textured, coated, or irregular, say so rather than relying on the phrase product label alone.
The team can review paper-based or synthetic face-stock directions and the adhesive requirement against the actual application. Avoid assuming that the same sticker specification fits every surface. The product shape, storage context, handling method, and desired removal behavior may all change the direction that needs to be discussed. The final sticker specification remains subject to the actual surface and production review.
The printed face should remain readable at the finished size and leave the contour doing a clear job. Share the brand name, product name, variable information if any, and the visual hierarchy that should appear on the proof. A small wordmark near a cut edge, a fine line crossing an irregular point, or a metallic accent close to a notch may need a closer artwork review than a broad central panel.
Foil Stamping can be considered for selected lettering or linework, subject to artwork review. Matte Lamination can provide a lower-sheen surface direction, while Spot UV can create localized gloss contrast on selected artwork areas. These options are not automatic upgrades. The chosen treatment should be checked with the sticker contour, face stock, adhesive direction, artwork scale, and receiving surface so the printed result matches the intended use.
The standard fulfillment path starts at 50 units. Production begins from 7 business days after digital proof approval, and free US shipping is included. Dieline and proof review are included at no extra charge. A sample kit can be requested when you need to compare a printed surface, finish, or cut detail before a larger order; sample-kit shipping is $44.99 and is credited toward your first order. No product-specific unit price is stated because no defensible live EBP sibling or approved price source was supplied for this sticker format.
Before approval, check the silhouette, printed panel, visible border, orientation, liner presentation, and any small contour feature that carries meaning. If the sticker will move from one application surface to another, include that update before the proof is approved. A quote is more useful when it reflects the real surface and handling method rather than only the sticker name.
Individual custom shapes can work as product labels when the contour supports the brand mark or product name. A package seal can use a compact repeatable shape at the point where a carton, pouch, or wrap is closed. Separate pieces can be packed with an order as a branded insert, or handed out at an event where the sticker itself is part of the interaction. A retail detail can use a shaped face to identify a product or highlight a defined panel.
The right application depends on the surface, artwork scale, handling method, and presentation goal. A shape designed for a carton may need a different face-stock or adhesive discussion before it is used on glass or a textured surface. Tell the quoting team where the sticker will go and how it will be applied so the cut and print direction are reviewed around the actual job.
Send the finished artwork or a clear contour reference, preferred finished width and height, widest and tallest points for an irregular design, quantity, application surface, artwork status, and any preferred face stock or finish. State whether the stickers should be supplied as separate pieces, a continuous format, or another arrangement, and identify any peel, orientation, or handling requirement. Include the intended use and any sample or existing label that clarifies the result.
The team can then review the cut path, face stock, adhesive direction, print coverage, finish, and presentation format before preparing a digital proof. Once the proof is approved, production can begin from 7 business days under the standard estimate. This sequence keeps the visible artwork and the physical sticker specification connected while leaving the final product-specific price to the quote.
Proof points
The specification brings the cut line, printed face, face stock, adhesive direction, finish, and presentation format into one proof so the visible design can be checked against the actual use.
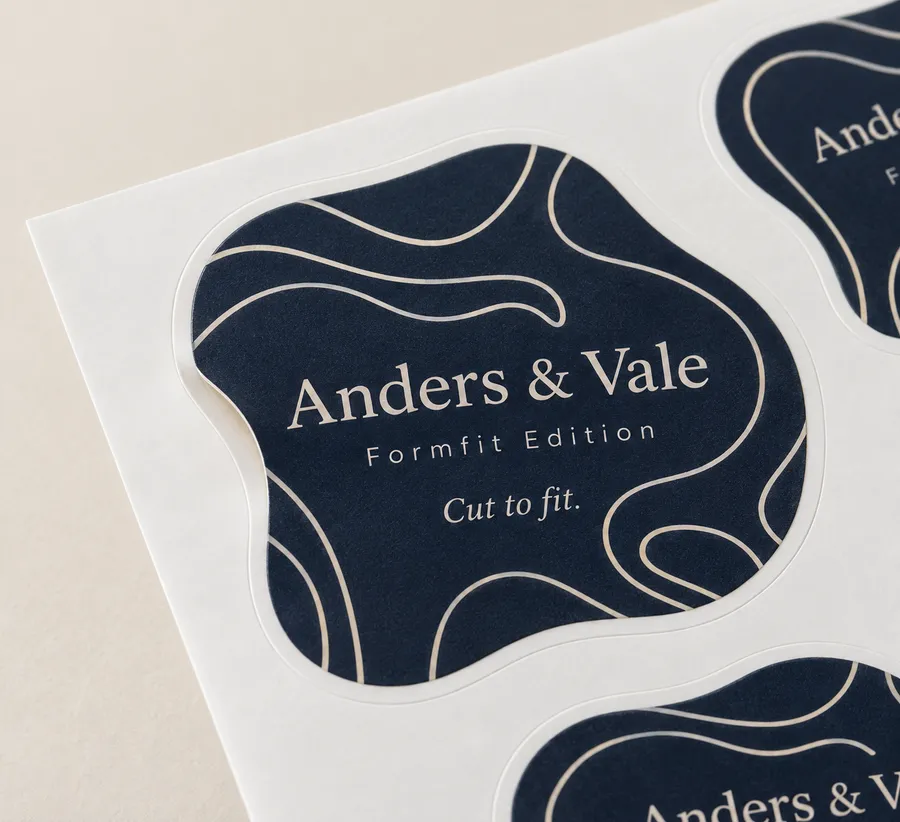
The contour can follow a brand mark, character, seal, badge, or other artwork feature that would lose its shape inside a rectangle. The quote brief should say whether the sticker is a separate label, package seal, insert, or another defined application so the cut and presentation are reviewed around a real job.
A shaped printed label for a carton, jar, insert, or other reviewed surface where the artwork contour is part of the identity.
A repeatable sticker shape for closing a carton, pouch, wrap, or parcel while keeping the printed mark visible at the seal point.
Separate sticker pieces packed with an order as a small printed detail that the recipient can apply or keep.
Custom-shaped printed pieces for event handouts, retail panels, campaign materials, or other defined presentation moments.
The printed face should be reviewed with the custom contour, artwork scale, face stock, adhesive direction, and receiving surface so the treatment is useful for the real application.
A useful brief connects the visible artwork with the receiving surface and the way each piece will be handled. These inputs give the proof a clear physical context before the final cut and print direction are approved.
Share the artwork or outline, finished width and height, widest and tallest points, and any notch, tab, point, or interior cutout.
Identify the carton, jar, insert, shipping box, event material, or other surface receiving the sticker, including curved or textured areas.
State whether the stickers should arrive as separate pieces, a continuous format, or another arrangement, and how they will be applied.
The order starts with the artwork contour and application details, then confirms the sticker specification, digital proof, and production path.
Provide the artwork or a clear outline for the desired sticker shape, including any irregular edge or small cut detail.
Provide the finished width and height, quantity, receiving surface, and how the stickers will be applied or handled.
Discuss the face-stock direction, adhesive requirement, print treatment, and presentation format for the intended use.
Check the cut path, artwork placement, visible border, orientation, liner presentation, and selected finish.
Confirm the reviewed sticker specification and digital proof before production begins.
Need help with structure, materials, or production planning? See how we manufacture custom packaging.
A sample kit ships for a $44.99 USD charge credited toward your first order, useful when you need to compare the printed surface, finish, or custom contour before approving a larger run.
Shipping charge: $44.99. Credited toward your first order.
Request a Sample KitFind clear answers about fit, materials, and ordering below.
A die cut sticker follows the supplied artwork contour rather than staying within a default rectangle. The proof reviews the cut path, visible border, artwork placement, and any small contour details together.
Share the artwork or contour, finished width and height, widest and tallest points for an irregular design, quantity, receiving surface, artwork status, handling format, and any face-stock or finish preference.
Yes. Separate sticker pieces can be reviewed alongside a continuous format or another arrangement. State how the stickers will be received, peeled, applied, packed, or distributed so the presentation matches the job.
Foil Stamping, Matte Lamination, and Spot UV are the category finish directions. The selected treatment remains subject to artwork, face-stock, adhesive, and custom-contour review.
The standard fulfillment path starts at 50 units, with production beginning from 7 business days after digital proof approval. Free US shipping is included on the standard fulfillment path.
Yes. A sample kit can be requested to compare the printed surface, finish, or custom contour before a larger order. Sample-kit shipping is $44.99 and is credited toward the first order.
Orders start at 50 units and scale up to 500,000 for bulk runs, with pricing from $0.31 per unit on larger quantities. Standard production is from 7 business days after digital proof approval.
Compare nearby products and request the format that best fits your next run.
Available product
Available product
Available product
Available product
Specify the application
Send the artwork contour, finished size, quantity, receiving surface, handling format, and finish preference to request a quote that reflects the real application.
Add your product details to see a quote summary.