Fitted retail presentation
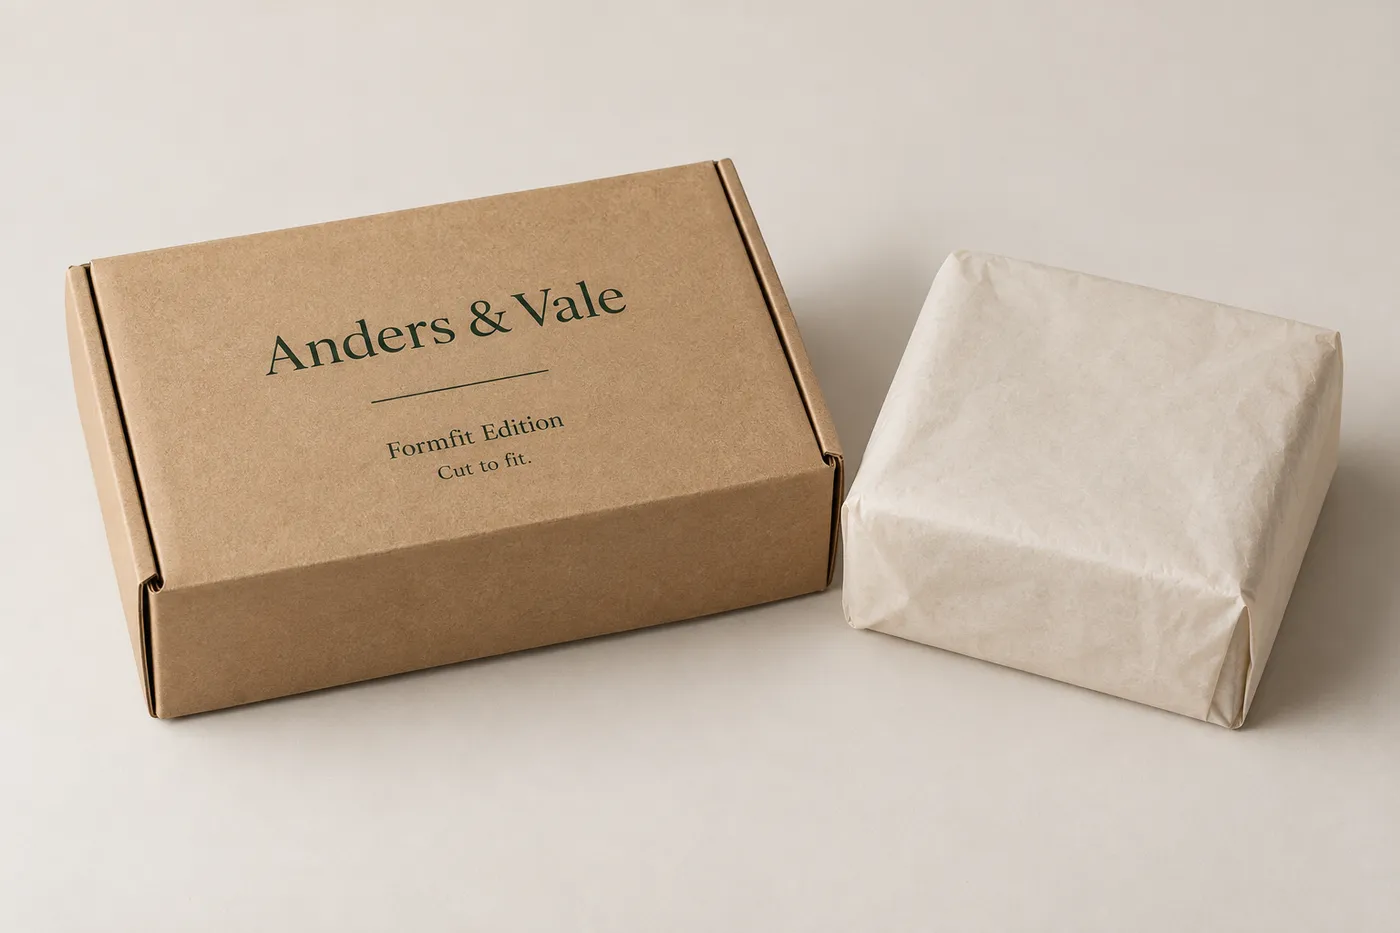
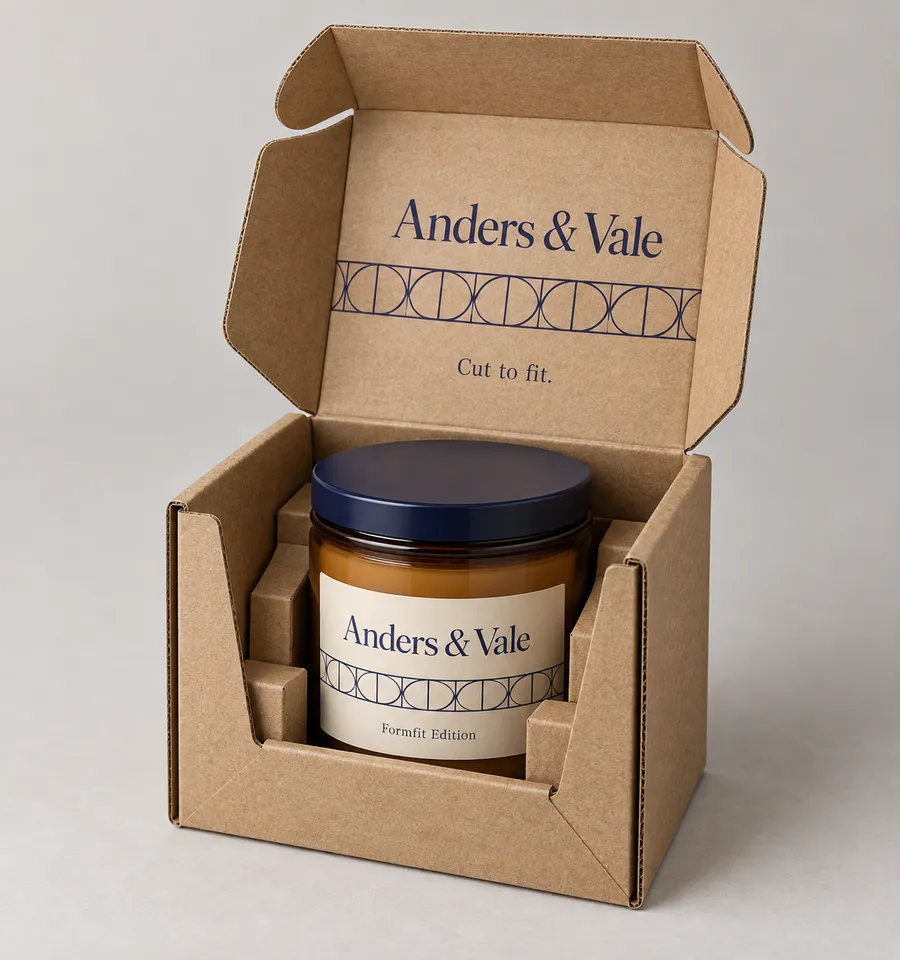
A shaped cavity can keep a small product in a defined position while the exterior carries the printed brand treatment.
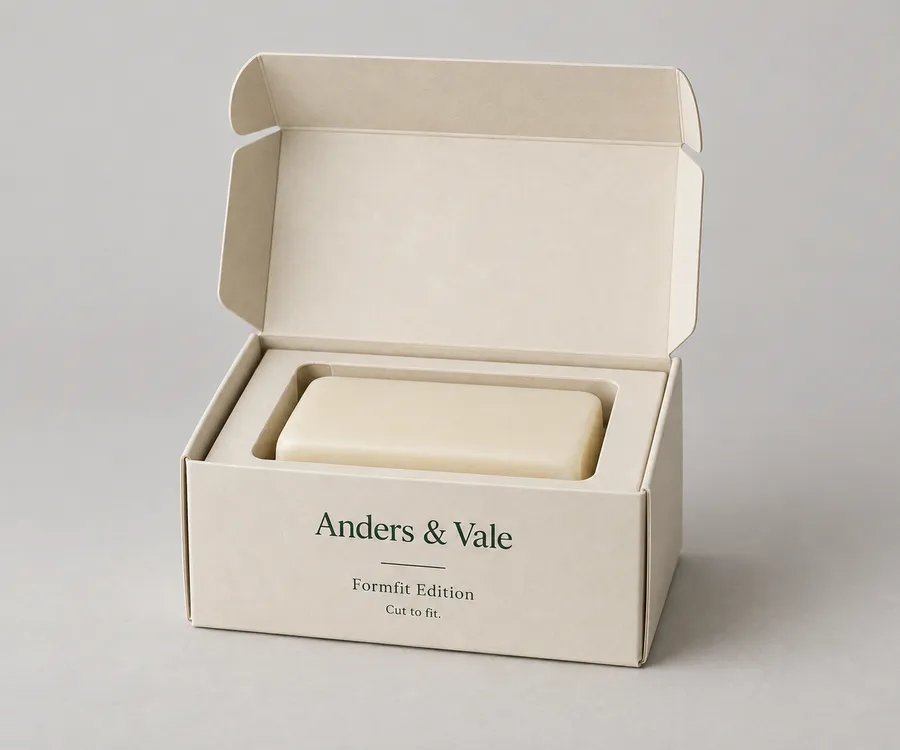
Open printed die-cut paperboard box with a fitted cavity and soap bar
Die-Cut Boxes
Custom printed die cut boxes built around the product's actual footprint, shape, and opening requirements. Choose a fitted cavity, window, locking tab, or other functional cut, then align the paperboard, printed panels, and finish with the way the box will be presented, filled, and handled.
Last updated
Working quote
Product brief
A custom printed die-cut box earns its place when the cut solves a real packaging problem. The useful starting point is the product's finished length, width, height, widest point, weight, orientation, and any closure or protrusion that changes the interior space. A flat soap bar, a small assembled component, and a product with a rounded shoulder may all need different cavity outlines even when their overall footprint looks similar. Send the product itself or a clear dimensional drawing so the dieline can be developed around the actual geometry rather than a standard rectangular assumption.
The cut may hold an item in a defined position, create a window for visibility, form a locking tab, or shape a tuck panel. Those are different jobs. A fitted cavity is concerned with retention and clearance. A window is concerned with what the customer can see before opening. A closure cut is concerned with how the pack closes and reopens. Defining the job first keeps the structural choice connected to the product instead of treating every die-cut box as the same format.
A fitted paperboard cavity can give a small product a clearer position inside the carton, while a shaped opening can let a customer inspect a surface or color before opening. A tuck flap or locking tab can change the opening sequence without adding separate hardware. For a box that contains a product with a curved edge, raised label, cap, or irregular silhouette, those features should be called out before the cut line is drawn. The internal support decision depends on geometry, weight, fragility, orientation, structure, fulfillment route, product-to-box clearance, and the desired reveal. Support may be integrated into the paperboard structure or provided as a separate insert, depending on the specification.
The outside footprint matters too. A broad front panel may be useful for a wordmark and product name, while the side panels may carry instructions or handling information. The top panel, cut edge, and closure need to agree with the reading direction of the artwork. If the box is intended for a retail shelf, gift presentation, or direct shipment, describe that handoff when requesting a quote because the same product geometry can lead to different priorities for visibility, opening, and support.
SBS Paperboard can provide a smooth, bright surface for detailed printed panels. Kraft Paperboard creates a natural fiber direction that changes how ink contrast and unprinted areas read. Corrugated Board can be considered when the package needs a more structured board direction for its intended route. The material choice should be reviewed with the cut edges, folds, closure, product weight, and desired surface character rather than selected from the exterior panel alone.
Foil Stamping can highlight selected lettering or linework, subject to artwork review. Matte Lamination can give the printed surface a lower-sheen appearance, while Spot UV can add localized gloss contrast to selected areas. A finish should be placed with the dieline in mind: small type near a fold, a foil element crossing a cut line, or a gloss accent beside a window may need a different artwork treatment. The final print and finish direction is confirmed against the actual dieline and proof.
For a quote, provide the product's length, width, height, widest point, shape, packed weight, orientation, and any part that must remain visible or accessible. Include the intended quantity, use route, artwork status, preferred material, and finish direction. If the box needs a fitted cavity, share a product sample or accurate outline. If it needs a window or locking tab, explain what the opening or closure should accomplish. Those details give the packaging review something specific to test before artwork is treated as final.
Orders start at 50 units, and production begins from 7 business days after digital proof approval. Free US shipping and dieline and proof review are included on the standard fulfillment path. A sample kit ships for a $44.99 charge credited toward your first order when you need to compare board feel, print treatment, and cut quality in hand. Quote requests are typically answered the same business day and always within 24 hours.
The proof should show the product-facing cavity or support, the position of any window or closure, the direction of the printed panels, and the chosen finish treatment. Check the assembled size, cut edges, fold lines, glue areas, and the way the product will be inserted and removed. A change to the product shape or orientation after approval can change the dieline, so updated dimensions should be reviewed before production.
This format can suit a single retail product in a fitted cavity, a gift item with a shaped opening, a small component that needs a defined presentation, or a branded pack with a functional tuck or locking feature. It can also give a product-shaped silhouette more presence than a standard rectangle when the cut is doing a clear job. The right brief is specific: identify what the cut holds, reveals, closes, or changes, then let the product geometry guide the box rather than asking the artwork to solve a structural problem after the fact.
Proof points
A useful proof makes the physical relationship between the product, the cut, and the printed surface easy to inspect before artwork is approved.
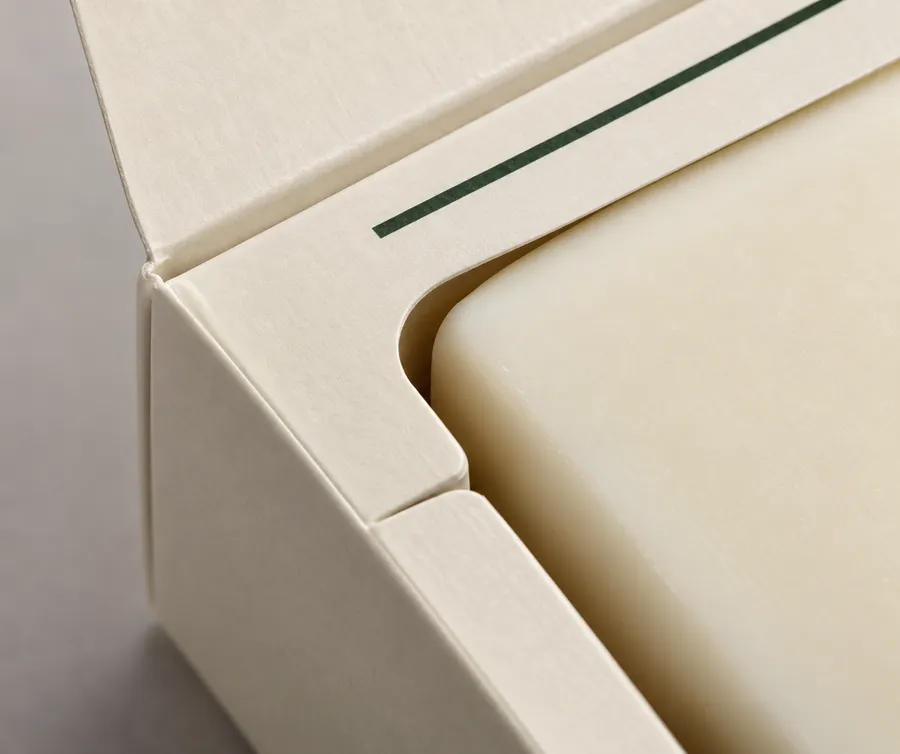
A die-cut box should begin with the job of the cut: hold the product in a defined position, reveal a surface through a window, create a locking tab, or shape the opening sequence. Product length, width, height, widest point, weight, orientation, and clearance give the dieline review a useful starting point.
A shaped cavity can keep a small product in a defined position while the exterior carries the printed brand treatment.
A die-cut window can reveal a selected surface, color, or texture before the package is opened.
A shaped opening or tuck feature can make the reveal and removal sequence part of the presentation.
A locking tab, tuck panel, or product-shaped silhouette can give the printed box a clear structural role.
The front panel, side walls, top, cut edge, and closure can create different reading angles. Choose the treatment with the folds, opening, product visibility, and artwork scale in mind.
The strongest die-cut box brief describes the product-facing fit and the customer-facing panel together, so the cavity, opening, closure, print, and finish can be checked as one package.
Length, width, height, widest point, shape, weight, and orientation inform the cavity and interior clearance.
A fitted cavity, window, tuck panel, or locking tab is selected for the job it needs to perform.
The dieline, printed panel direction, cut edges, folds, closure, and finish treatment are reviewed before production.
A quote is easier to evaluate when the product, cut purpose, route, and artwork are described together rather than reduced to the product name alone.
Provide length, width, height, widest point, shape, packed weight, orientation, and any part that must remain visible or accessible.
Explain whether the box needs a fitted cavity, window, locking tab, tuck feature, or another functional cut.
Explain whether the box is intended for retail presentation, gifting, sampling, direct shipment, or another defined handoff.
Share artwork status and any preference for SBS Paperboard, Kraft Paperboard, Corrugated Board, Foil Stamping, Matte Lamination, or Spot UV.
Confirm the product position, cut feature, printed panel orientation, closure, and finish representation before production begins.
Need help with structure, materials, or production planning? See how we manufacture custom packaging.
A sample kit ships for a $44.99 USD charge credited toward your first order, useful when you need to compare board feel, print treatment, and die-cut detail before approving the custom box.
Shipping charge: $44.99. Credited toward your first order.
Request a Sample KitFind clear answers about fit, materials, and ordering below.
Share the product's length, width, height, widest point, shape, packed weight, orientation, intended route, quantity, artwork status, and any feature that must remain visible or accessible.
It can create a fitted cavity, window, locking tab, tuck feature, or product-shaped opening. The right direction depends on whether the cut is holding, revealing, closing, or changing the opening sequence.
SBS Paperboard, Kraft Paperboard, and Corrugated Board are the category material directions. The choice is reviewed with the product geometry, printed surface, presentation, and fulfillment route.
Foil Stamping, Matte Lamination, and Spot UV are available finish directions. The chosen treatment remains subject to artwork review, especially where it meets folds, cut edges, closures, or small lettering.
The approved standard estimate is from 7 business days after digital proof approval. Orders start at 50 units, and free US shipping is included on the standard fulfillment path.
Orders start at 50 units and scale up to 500,000 for bulk runs, with pricing from $0.26 per unit on larger quantities. Standard production is from 7 business days after digital proof approval.
Custom printed die cut boxes built around the product's actual footprint, shape, and opening requirements. Each order is made to order around your packed product and artwork, and the specification is confirmed against a digital proof before production.
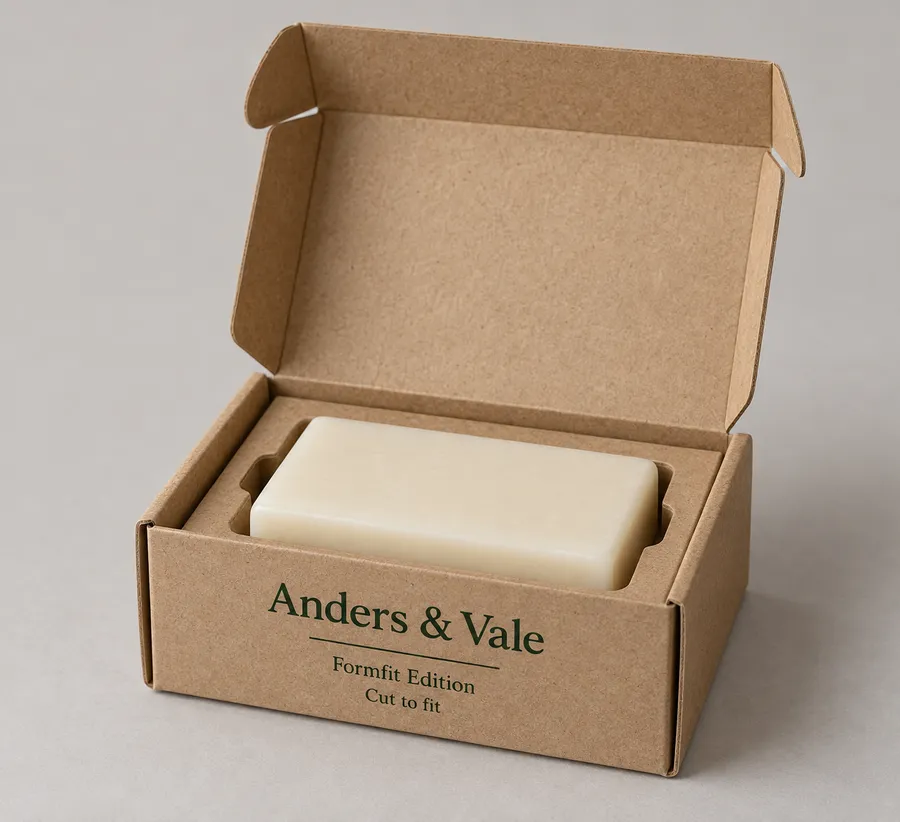
Compare nearby products and request the format that best fits your next run.
Available product
Available product
Available product
Available product
Plan the structure
Send the product geometry, the job the cut needs to do, intended route, material direction, and artwork status. Easy Box Packaging can then review the structural and printed specification together.
Add your product details to see a quote summary.