Candles and Home Fragrance
A centered candle can sit inside a fitted base while the neck keeps the lid aligned and leaves the top label visible at the first lift.

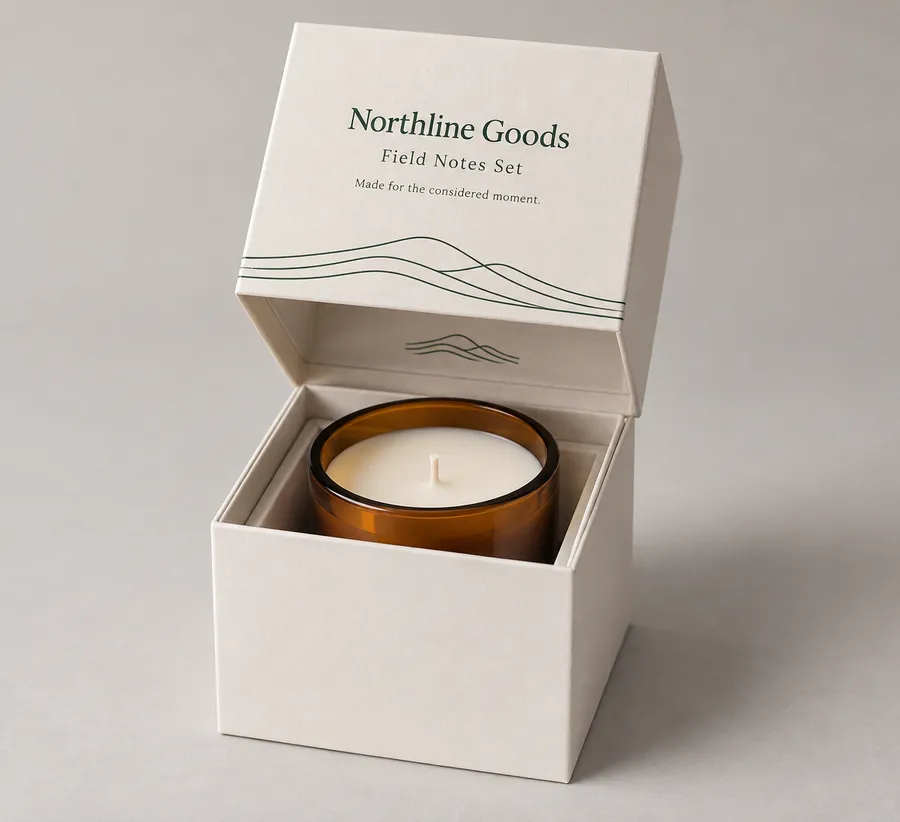
Open shoulder rigid box with candle jar framed by its inner neck
Rigid Boxes
Custom shoulder rigid boxes use a fitted inner neck beneath the lid to create a measured opening and a stable presentation for candles, cosmetics, accessories, keepsakes, and curated sets. The finished box is scoped around the packed product, collar clearance, internal support, printed panels, and the finish direction you want customers to see first.
Last updated
Working quote
Product brief
Custom shoulder rigid boxes are made-to-order presentation boxes with a base, a lid, and a fitted inner shoulder or neck that controls how the lid meets the box. That extra collar changes the opening sequence: the top lifts to a defined stop, the base stays visually framed, and the product can be revealed without the lid sliding freely across the outside. It is a useful construction when the package itself is part of a handoff, shelf display, gift set, or direct-to-customer unboxing.
Start with the packed item rather than a nominal box size. Measure the length, width, and height of the product in the condition it will actually enter the box, including a wrap, bottle neck, accessory, or insert that remains inside. The base needs enough clearance for loading and removal, while the shoulder needs enough engagement to hold the lid in alignment without making the opening awkward. Share the orientation the customer should see first and whether one item or several components share the interior.
A shoulder construction is especially sensitive to the relationship between the inner neck and the lid. If the collar is too loose, the lid can feel unregistered; if it is too tight, the opening can fight the contents or scuff a printed edge. Internal support depends on product geometry, weight, fragility, orientation, structure, fulfillment method, product-to-box clearance, and the desired reveal. Support may be integrated into the paperboard structure or provided as a separate insert after those factors are reviewed together.
The shoulder is an inner ledge or collar that sits below the top edge of the base. The lid travels over that neck and stops against the shoulder, creating a repeatable closed position and a staged lift-off opening. Unlike a collapsible paperboard package, the rigid base keeps its shape while the lid is removed. Unlike a drawer, the product does not need to travel forward on a tray; the reveal comes from lifting the top and exposing the framed interior.
This geometry should be resolved with the packed product and any insert. A candle may need a centered cavity and a visible top surface. A bottle may need clearance around its cap and a support plan that keeps it upright. A small accessory set may need a divider or a shaped paperboard platform so individual pieces do not overlap. The shoulder does not decide those details by itself; it gives the lid and base a defined relationship while the internal arrangement is specified.
Kraft Paperboard, SBS Paperboard, and Corrugated Board are the category's material directions. Kraft Paperboard keeps a natural paper character when that surface is part of the design language. SBS Paperboard offers a smooth printed surface for artwork that depends on clean color fields or fine type. Corrugated Board can suit a more substantial profile or a pack that travels inside an outer shipper. The final choice depends on the finished dimensions, fold and wrap requirements, print coverage, shipping route, and the way the box will be handled.
Matte Lamination, Gloss Lamination, Spot UV, Foil Stamping, and Embossing/Debossing can be considered as finish directions. Lamination changes the surface appearance and handling character of the printed wrap. Foil Stamping can highlight selected lettering or linework, subject to artwork review. Embossing/Debossing changes the relief of a mark and should be reviewed with the board and artwork together. Spot UV can identify one logo or panel with a localized gloss treatment. The useful brief names the panel and detail that deserve attention instead of applying every effect everywhere.
Reserve the largest uninterrupted lid panel for the brand or product name, then map secondary copy to the base, shoulder, or inside lid. The dieline will show where the neck, wrap, folds, and hidden edges sit, so important text should stay clear of those transitions. If the opening is part of the experience, an interior message or pattern can be planned as a second printed surface rather than left to the final proof. Send the outside and inside artwork together when both views matter.
A useful shoulder-box brief includes the packed dimensions, product weight, quantity per box, preferred opening direction, insert or divider needs, material direction, print coverage, finish choices, shipping destination, and artwork status. Production starts from 7 business days after digital proof approval on the standard path. The minimum order is 50 units, and free US shipping applies on that path. Dieline and proof review are included at no extra charge. A sample kit carries a $44.99 USD shipping charge credited toward the first order when you want to check board feel, shoulder fit, and finish before a full run.
A clear specification lets the quote focus on the actual decisions: how the product sits, how the lid meets the neck, which panel carries the printed identity, and how the finished box moves through fulfillment. That is more useful than choosing a stock-looking ratio and trying to force the product into it after artwork is complete.
Proof points
The finished direction is defined by the fitted neck, rigid base and lid, selected board direction, printed panels, and surface treatment reviewed for the actual packed product.
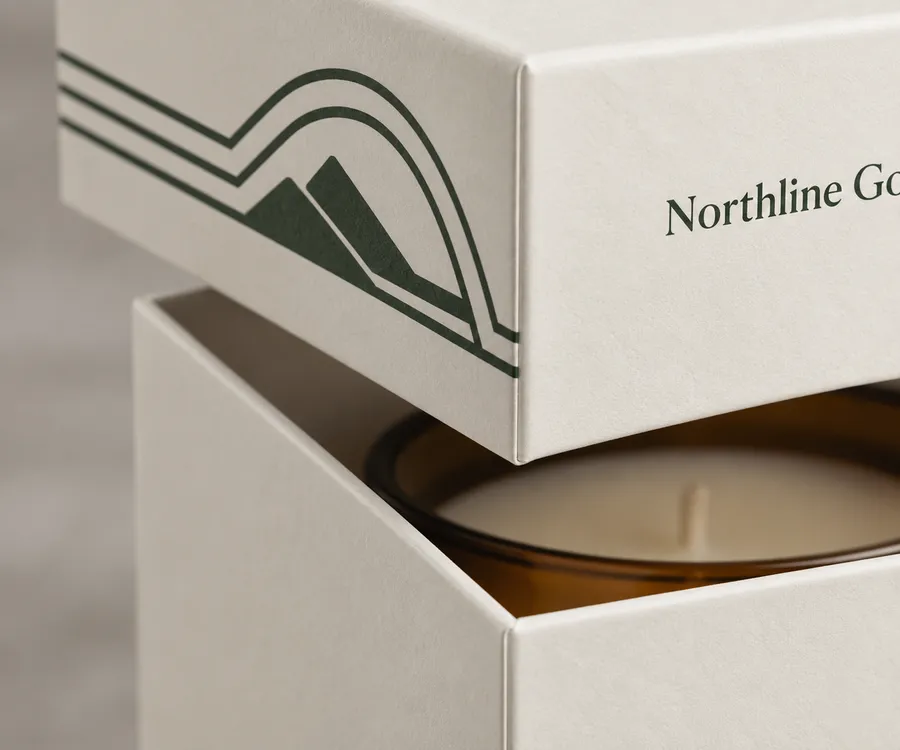
Scope the base, lid, and inner neck from the packed product, its orientation, and the opening clearance you want. Share the finished length, width, height, product weight, quantity per box, and any insert so the collar fit and usable interior can be reviewed as one construction.
A centered candle can sit inside a fitted base while the neck keeps the lid aligned and leaves the top label visible at the first lift.
The box can be planned around a bottle, cap clearance, and a support or cavity that keeps the product presented upright.
Jewelry, stationery, small leather goods, or a keepsake can use the shoulder as a quiet frame around the first view of the item.
A divided layout can keep several components ordered inside one lift-off package when the product count and reveal are known before sizing.
Use the lid for the primary brand or product identity, then decide whether the base, shoulder, and inside lid should carry supporting artwork. The dieline keeps those decisions tied to folds, edges, and the opening view.
A shoulder collar controls the lid, but it does not automatically hold every product in place. Internal support is reviewed against geometry, weight, fragility, orientation, structure, fulfillment route, clearance, and the intended reveal.
Describe which face, label, cap, or accessory should be visible first and whether the item must remain upright during handling.
The shoulder engagement and any divider, riser, or cavity should leave practical loading clearance without letting the product wander inside the base.
Place support where it protects the product and still lets the lift-off lid expose the intended surface when the box is opened.
The quote process turns the packed product and presentation brief into a reviewed shoulder, lid, insert, print, and finish specification.
Send the product or a packed sample with length, width, height, weight, wrapping, and quantity per box.
Explain the preferred lid movement, visible face, shoulder engagement, interior message, and loading clearance.
Identify a cavity, divider, riser, or other support direction and note whether one item or a set is packed inside.
Name the preferred Kraft Paperboard, SBS Paperboard, or Corrugated Board direction and any lamination, foil, embossing, debossing, or Spot UV treatment.
Review the shoulder fit, folds, artwork panels, and digital proof at no extra charge before production.
Need help with structure, materials, or production planning? See how we manufacture custom packaging.
Check the board feel, shoulder engagement, lift-off opening, insert behavior, and printed finish before committing to a full run. The sample kit carries a $44.99 USD shipping charge credited toward your first order.
Shipping charge: $44.99. Credited toward your first order.
Request a Sample KitFind clear answers about fit, materials, and ordering below.
It is a rigid base-and-lid box with an inner shoulder or neck beneath the lid. The lid travels over that collar and stops in a defined position, creating a controlled lift-off opening rather than a loose cover.
Measure the product in the condition that will actually be packed, including wrap, cap, accessory, or insert. Share length, width, height, weight, orientation, quantity per box, and the clearance needed for loading and removal.
No. The shoulder registers the lid and base, while internal support is a separate decision. A cavity, divider, riser, or other support depends on geometry, weight, fragility, orientation, clearance, fulfillment, and the reveal you want.
The category directions include Kraft Paperboard, SBS Paperboard, and Corrugated Board. Matte Lamination, Gloss Lamination, Spot UV, Foil Stamping, and Embossing/Debossing can be considered subject to the artwork and construction review.
Interior printing can be planned for the inside lid or other printable panels. The dieline should be checked first so messages avoid the shoulder, folds, hidden edges, and areas that will not be visible in the intended opening.
The standard fulfillment path starts at 50 units, with production from 7 business days after digital proof approval. Free US shipping applies on that path; the final schedule depends on the approved specification, artwork, quantity, and destination.
Orders start at 50 units and scale up to 500,000 for bulk runs, with pricing from $0.15 per unit on larger quantities. Standard production is from 7 business days after digital proof approval.
Compare nearby products and request the format that best fits your next run.
Available product
Available product
Available product
Available product
Get Started
Send the packed dimensions, product weight, quantity, preferred opening, interior support, material direction, print coverage, finish preference, and artwork status to request a quote.
Add your product details to see a quote summary.