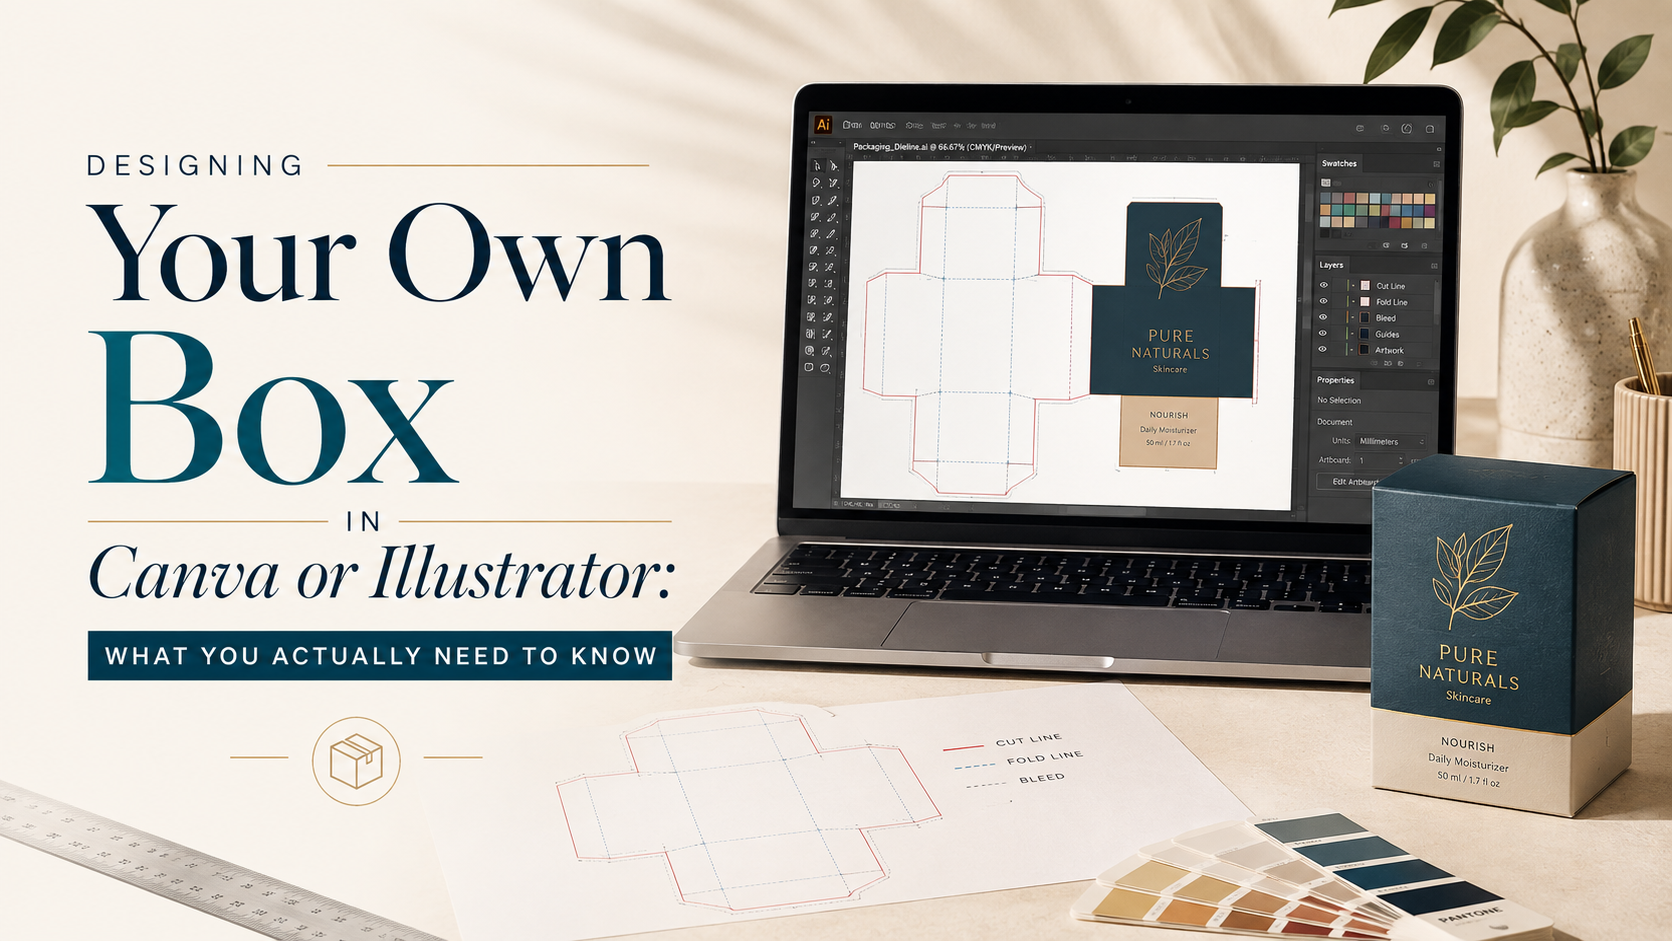
Most brands looking to design custom boxes in Canva or Illustrator start in the wrong place. They open one of the tools, start drawing a box shape, pick colors, add a logo — and then discover three weeks later that the file their printer received isn’t usable. Wrong color mode. No bleed. Text sitting on fold lines. Sometimes an entirely wrong format. The reprint costs real money, and the delay costs time that mattered. Here’s the actual workflow — what to set up before you touch a design tool, what Canva can and can’t do for box design, and what Illustrator does that Canva simply can’t replicate for print-ready packaging files.
The short version: both tools can get you to a printed box. But the path is different, and Canva’s path has more traps than most guides acknowledge.
Design Custom Boxes Canva Illustrator: Start With the Dieline, Not the Design
This is where most brands go wrong. They open a design tool and start building a box shape from scratch — a rectangle here, a flap there — without understanding that a box is a 3D object printed flat. The flat layout, with every panel and flap correctly sized and positioned, is called a dieline. It’s the structural blueprint your design must live inside.
You don’t create the dieline yourself. You get it from your packaging supplier.
Every box format — mailer box, tuck-top, RSC shipper, rigid two-piece — has a specific dieline that accounts for the box’s dimensions, board thickness, and how the panels fold and lock. A supplier who quotes your box will provide the dieline template, usually as an Adobe Illustrator .ai or .eps file, sometimes as a PDF. This is your canvas. Your artwork goes on top of it, on a separate layer, with the dieline layer locked underneath as a guide.
If you start designing without a dieline, you don’t know where the folds are. You don’t know which text will end up on a side panel versus a flap. You don’t know where the bleed needs to extend. Understanding what a box dieline is and why it matters before printing is genuinely the prerequisite step for everything else on this page.
Get the dieline first. Then open your design tool.
File Setup: CMYK, Bleed, and Safe Zones
Before placing a single design element, three file settings determine whether your printer can use what you send.
Color mode: CMYK, not RGB. Screens display color in RGB (red, green, blue light). Printers reproduce color in CMYK (cyan, magenta, yellow, black ink). RGB colors that look vivid on screen — particularly bright blues, purples, and reds — often shift significantly when converted to CMYK on press. The fix is to design in CMYK from the start, not convert at the end. A color you build in CMYK is what it is; a color built in RGB and converted later may or may not survive the translation.
Bleed: 0.125 inches on all edges. The bleed is the area beyond the box’s trim line where background color or design extends. Printing and cutting have small tolerances — a box panel can be trimmed slightly inside or outside the intended line. Without bleed, that tolerance creates a thin white sliver along the edge of a printed panel. Standard bleed for corrugated and folding carton packaging is 0.125 inches (3mm) on all sides. Every panel needs it. Set it before you start designing.
Safe zone: 0.125 inches inside the trim line. The safe zone is the inverse of bleed — it’s the buffer inside the cut line where important content (text, logos, key design elements) must stay. Anything too close to the trim line can be cut off or end up on a fold. Keep all text and logos at least 0.125 inches inside the trim line. For fold lines specifically, keep text farther — 0.25 inches is a safer minimum, since fold registration has its own tolerance.
Using Canva to Design Custom Boxes: What It Can and Can’t Do
Canva is genuinely good at quick visual design. If you’re creating social graphics, one-pagers, or label artwork, it’s fast and produces sharp output. For box design specifically, it has real limitations that most Canva-first guides don’t tell you.
What Canva handles fine: artwork composition, type layout, color selection, logo placement. If you’re building a design concept to review with a supplier or to hand off to a print service that will adapt your artwork to their dieline, Canva works as a starting point. Some print-on-demand services that handle mailer box printing accept Canva artwork because they do the dieline integration on their end.
What Canva gets wrong for print-ready box files:
Canva operates in RGB by default. Its PDF export has a CMYK option in the paid plan, but it’s not always reliably CMYK on output — printers have received Canva-exported PDFs that tested as sRGB on press. If your printer requires a true CMYK PDF/X-1a file (which most professional packaging printers do), Canva’s output may not qualify without additional processing.
Canva doesn’t support dieline layers. You can’t import your supplier’s .ai dieline, lock it to a guide layer, and build artwork on a separate layer above it the way Illustrator or InDesign would handle it. You can use a dieline image as a background reference, but it’s not a functional workflow — it’s improvised.
Bleed setup in Canva is document-level, not panel-level. When your box has multiple panels at different dimensions (a mailer box has an exterior face, interior, lid, side panels), Canva doesn’t handle that complexity cleanly. You end up with multiple separate Canva documents representing different panels, then you need to assemble them — which introduces alignment errors and seam issues.
I’ve seen brands try to design custom boxes in Canva for a full corrugated mailer and submit the result to their supplier, only to be told the file needed to be rebuilt from scratch. The artwork was fine. The file structure wasn’t. That’s not a Canva failing per se — it’s a workflow failing. Canva isn’t built for professional print production, and complex box formats push it past its design intent.
If you’re using a service like a print-on-demand packaging platform, Canva integration is often built in and the platform handles the technical file requirements. That’s the right context for Canva. For a direct supplier relationship with a traditional packaging printer, Illustrator is the correct tool.
How to Design Custom Boxes in Illustrator: The Print-Ready Workflow
Illustrator is the industry standard for packaging design for good reason. It’s vector-based (so artwork scales without quality loss), it works natively in CMYK, and it handles the multi-layer dieline workflow that box design requires.
Here’s the workflow that actually produces a usable file:
Step 1: Open your supplier’s dieline in Illustrator. The dieline will be an .ai or .eps file with the structural lines (cut lines, fold lines, bleed lines) on separate layers or as separate stroke styles. Cut lines are typically solid; fold lines are dashed. In some templates, these are labeled.
Step 2: Create a new layer above the dieline layer. Lock the dieline layer. This is critical. Your artwork goes on its own layer; the dieline stays beneath it, locked, as a permanent guide. You design around the dieline — you don’t move the dieline to fit your design.
Step 3: Set your document color mode to CMYK. File → Document Color Mode → CMYK Color. Do this before placing any design elements. If you place an RGB image into a CMYK document, Illustrator will flag it; address those warnings before submitting to print.
Step 4: Design within the bleed and safe zone boundaries. Use the dieline’s bleed line as your outer design boundary — background colors and full-bleed patterns extend to this line. Text and logos stay inside the safe zone, at least 0.125 inches inside the trim line and 0.25 inches from any fold.
Step 5: Export as PDF/X-1a. PDF/X-1a is the print industry standard for press-ready files. It embeds all fonts, converts spot colors to CMYK (or maintains named spot colors for Pantone matching), and ensures no RGB color data survives in the output. File → Save As → Adobe PDF → PDF/X-1a:2001 preset. Most professional packaging printers specify this format explicitly. If your printer accepts PDF/X-4, that works too — it supports transparency, which X-1a does not.
When you design custom boxes in Canva or Illustrator and reach the point of submitting to a real print supplier, a correctly structured Illustrator file with a PDF/X-1a export is what the supplier’s prepress team will actually be able to work with without asking you for revisions.
Design Custom Boxes Canva Illustrator: The Mistakes That Cost Real Money
The packaging mistakes that hurt brands most at the design stage aren’t creative — they’re technical. These are the file errors that come back as reprint quotes and production delays.
Submitting an RGB file. A design built in RGB and submitted to print will shift color on press. Blues go purple. Bright reds go orange-ish. The print is not what the screen showed. This is the single most common technical error in brand-submitted packaging files, and it’s entirely preventable by setting CMYK from document creation.
No bleed. The classic. Background color stops exactly at the trim line, so when the cutter runs slightly inside the trim (which it will, within tolerance), there’s a white or unprinted sliver along the edge. Printers will either reject the file or send a proof showing the white edge — neither is the outcome you wanted.
Text on fold lines. A word that looks fine in the flat design is split by the fold in the physical box. “EASY” on a flat file becomes “EA” on one panel and “SY” on the adjacent panel once the box is folded. Place text well inside fold lines. Review the dieline against your design before submitting — check what’s crossing each fold line.
Low-resolution raster images. Print requires 300 DPI at the final printed size. A logo that’s 72 DPI from a website, scaled up to fill a 12″ box panel, will print soft and pixelated. Use vector .ai, .eps, or .svg versions of logos whenever possible. For photos, ensure they’re 300 DPI at the actual size they’ll appear on the box — not 300 DPI at thumbnail size.
Wrong PDF version or settings. A regular PDF is not a print-ready PDF. If your file has embedded fonts that aren’t outlined, transparencies that haven’t been flattened, or RGB images inside a CMYK document, the printer’s prepress process will flag it. The PDF/X-1a preset in Illustrator handles all of this automatically.
When to Hire a Designer Instead
There’s a threshold where the DIY route costs more than a designer would. I’d put it roughly here: if you don’t own Illustrator, don’t have packaging design experience, and are ordering more than 500 units of a box that represents your brand to customers — hire a packaging designer for the artwork file, then manage everything else yourself.
A print-ready packaging file from a competent designer costs $300–$800 for a straightforward mailer box design. The cost of a reprint because your file had RGB images and no bleed on a 500-unit run is $400–$1,200 depending on box size and print method. The math isn’t hard. Design investment is also directly connected to how packaging drives repeat purchases — a box that’s professionally designed and correctly printed generates better customer response than one that’s slightly off-color and has soft text from a low-res logo.
If you want to design the box yourself and have Illustrator experience, do it. The workflow above will get you to a usable file. If you’re new to print design, Canva for the initial concept plus a production designer to convert it to a print-ready file is a reasonable split — you control the creative direction, the designer handles the technical output.
What to Send Your Printer
When you submit your finished file, include:
The print-ready PDF (PDF/X-1a preferred). This is your primary submission. All fonts outlined or embedded. All images 300 DPI at final size. CMYK throughout.
A visual reference file (low-res JPEG or PNG showing the finished design). Printers use this to spot-check artwork against the PDF during prepress. It helps the prepress team catch structural issues before print.
A Pantone color callout if applicable. If any brand colors need to match a specific Pantone (PMS) number for consistency across print runs, note them explicitly in your submission email. Don’t assume the printer will guess your intended Pantone from the CMYK values in the file.
Dieline confirmation. Confirm the box dimensions match what was quoted. If your supplier provided the dieline, this is a formality — but if there’s any doubt about dimensions, confirm before printing 500 units of a box that’s 1/4 inch too small for your product.
For the packaging formats that work best in an ecommerce shipping context — custom mailer boxes being the most common — the print-ready file workflow is the same regardless of format. The dieline changes; the setup principles don’t. See our ecommerce packaging options for format details and what supplier-provided dielines look like for common box types.
FAQ: Designing Custom Boxes in Canva or Illustrator
Can I actually design a print-ready custom box in Canva?
For simple flat artwork going to a print-on-demand packaging service with built-in Canva integration, yes. For a traditional packaging supplier requiring a PDF/X-1a file with proper CMYK output and panel-level bleed setup, Canva’s workflow gets complicated fast. Canva is RGB-first, doesn’t support proper dieline layer workflow, and its PDF export doesn’t reliably produce true CMYK files in all print environments. For DTC brands ordering from a direct packaging supplier, Illustrator is the correct tool.
Do I need Adobe Illustrator to design custom box packaging?
No, but it’s the industry standard and what most packaging printers prefer. Free alternatives like Inkscape (vector-based, open source) can produce print-ready SVG and PDF exports and support CMYK working files. Affinity Designer is a paid alternative at a lower price point than Illustrator with similar vector and print-ready export capability. Any tool that exports PDF/X-1a in CMYK will satisfy most printing requirements.
What is a dieline and where do I get one?
A dieline is the flat structural template of your box — every panel, flap, fold, and cut line laid out flat, to scale. It’s the foundation your artwork is built on. Your packaging supplier provides the dieline for the specific box format and dimensions you’ve ordered. If a supplier doesn’t provide a dieline template, ask for one explicitly before starting design work. Some suppliers provide online dieline generators; others send .ai or .eps files directly.
What resolution do box artwork images need to be?
300 DPI at the final printed size. A photo that’s 300 DPI at 4 inches needs to be at least 900 DPI at the original file size if it’s going to be scaled up to 12 inches in the design. Always check image DPI at the actual size the image appears in your layout, not at the original file size. Vector artwork (logos in .ai, .eps, .svg format) is resolution-independent and always prints at full quality.
What’s the difference between PDF/X-1a and a regular PDF?
PDF/X-1a is a print-specific PDF standard that guarantees: all fonts are embedded or outlined, no RGB color data exists in the file, all images meet print resolution requirements, and transparency is flattened. A regular PDF can have all of these things wrong and still open and display correctly on screen. Printers specify PDF/X-1a because it eliminates prepress surprises. In Illustrator, the PDF/X-1a:2001 export preset handles all of this automatically.
How do I choose colors that print accurately on my custom box?
Design in CMYK from the start. For brand colors that need to match across multiple print runs or materials, specify Pantone (PMS) colors in addition to CMYK values. Pantone matching gives printers a specific, reproducible ink formula rather than a CMYK approximation. Be aware that not all Pantone colors translate cleanly to CMYK — some bright Pantone colors (particularly neons and certain blues) are outside the CMYK gamut and will appear muted when printed in process color. Ask your printer for a CMYK gamut reference if color accuracy is critical for your brand.
Can I use a template from Canva and send it to my packaging supplier?
It depends on the supplier. Print-on-demand packaging services with Canva integration accept Canva output directly. Traditional packaging printers typically need a print-ready PDF from a CMYK source. If you’ve built your design in Canva, export the highest-quality PDF Canva offers, then ask your supplier’s prepress team to review it before production — most will flag issues before printing rather than proceed with a bad file. The safer path is to treat Canva output as a design reference and rebuild the final file in Illustrator or have a designer do so.
The File Is the Foundation. Get It Right Before You Print Anything.
Every brand that’s gone through a packaging reprint because of an RGB file, missing bleed, or text on a fold will tell you the same thing: the design wasn’t the problem. The setup was. When you design custom boxes in Canva or Illustrator, the creative work matters — but the technical setup determines whether that creative work actually makes it to the box the customer opens.
Dieline first. CMYK from the start. Bleed on every edge. Safe zone on every panel. PDF/X-1a out the door. Those five things are what separates a design file from a print-ready file. The rest is taste.
Easy Box Packaging provides dieline templates for all standard box formats when you request a quote. See our ecommerce packaging options to find the right format, get a dieline, and start your design file on the right foundation.