
The MOQ Myth That Keeps Brands on Plain Brown Boxes
When most people hear “custom packaging,” they’re picturing offset printing. That’s the traditional commercial printing process — it requires physical plates, a long setup process, and minimum runs of 500 to 1,000 units before it makes economic sense. It’s how big brands get their boxes down to $0.40 each. But it’s also completely irrelevant to where you are right now. Cheap custom packaging for small businesses used to mean exactly that: you either paid a lot or accepted plain boxes. That changed when digital printing matured.
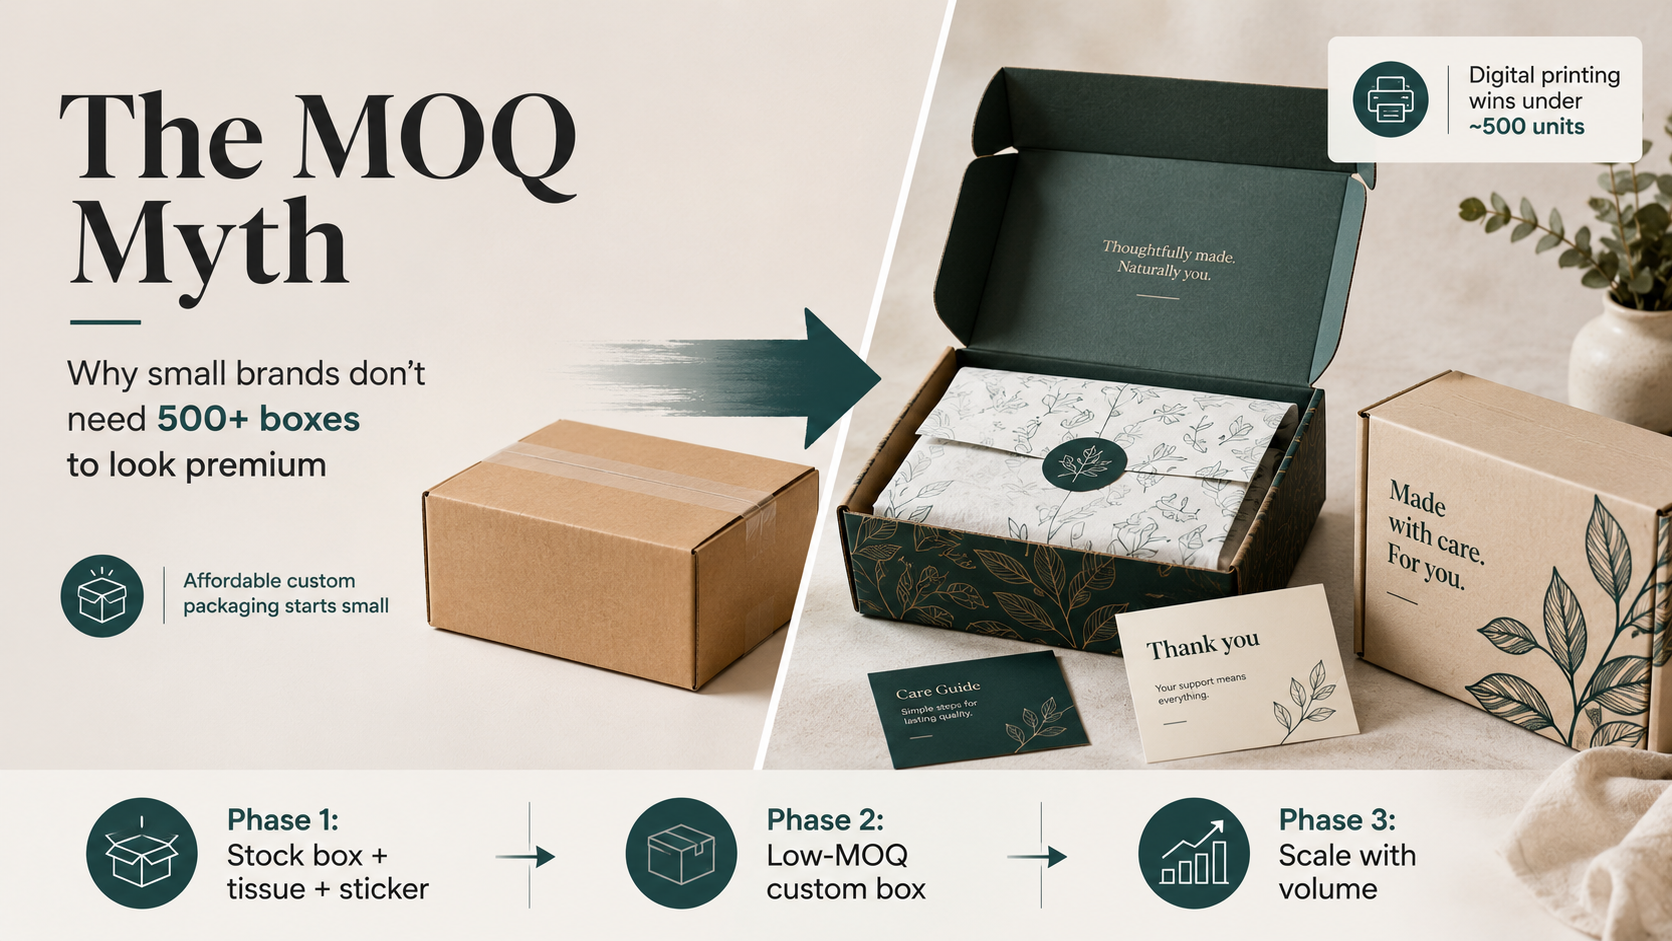
Digital printing changed everything for small-batch orders. There are no plates. No setup fees. The machine prints your design directly onto the material, which means a run of 50 boxes costs roughly the same per unit as a run of 100. You’re not penalized for ordering small.
Low MOQ custom boxes — meaning runs of 25–100 units — are now the standard entry point for digital printing, depending on the supplier and box size. The per-box cost is higher than offset — you might typically pay $1.50–$3.00 per box at 100 units vs. typically $0.60–$1.00 at 2,000 units — but that’s the right trade-off when you’re not moving 2,000 units a month yet.
The break-even math is straightforward. Under roughly 500 units, digital wins. Over 2,000, offset wins. Between 500 and 2,000, it depends on your margins, your cash flow comfort, and whether you want to lock up inventory. Most early-stage brands have no business ordering 1,000 boxes at a time — you’d rather spend that cash on ads or inventory.
The other thing nobody talks about: offset printing locks you into a design. If you want to update your logo, change your tagline, or run a seasonal version, or even just fix a typo, you’re eating the sunk cost of those plates. Digital lets you iterate without penalty.
Honestly, the confusion between digital and offset printing has cost small brands years of brand-building. It’s one of those things the industry benefits from keeping murky — suppliers who work at scale have no incentive to explain that you don’t need them yet.
What you’ll learn:
- Why digital printing changes the MOQ math for small brands
- The 3-phase budget framework — what to spend at each order volume
- Which single packaging element gives the biggest impact per dollar
- Where you should never cut costs, no matter how tight the budget
- A step-by-step phase-in roadmap based on your monthly order volume
Time to read: 10 minutes
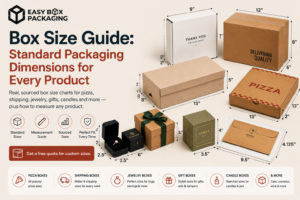
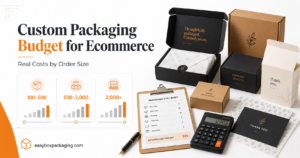
What “Branded Packaging” Actually Means at Different Budget Levels
There’s no single version of branded packaging. There’s a spectrum, and each phase makes sense at a different order volume.
Phase 1: 0–100 orders per month
Don’t buy custom printed boxes yet. You don’t need them, and the economics don’t work.
Instead, buy standard stock boxes in the right size, then layer in branded elements:
- A custom sticker or wax seal on the outside: typically $0.10–$0.25 each
- Branded tissue paper (one color, your brand color): typically $0.05–$0.14 per sheet
- An insert card — a thank-you note or product card with your logo: typically $0.05–$0.10 each
- A simple printed label on the inside flap if you want one more touch: typically $0.03–$0.08 each
Total add-on cost per order: typically $0.25–$0.50. For under fifty cents. The box still looks intentional. Customers notice. Some of them photograph it.
This isn’t a compromise strategy. For brands under 100 orders a month, this is the correct strategy. Budget branded packaging done right — tissue, sticker, insert — can look as intentional as anything a much bigger brand ships. You’re not leaving money on the table — you’re not bleeding cash on printing you don’t need yet.
Phase 2: 100–500 orders per month
This is where a short-run custom printed box starts to make financial sense. You’re ordering consistently enough that you’ll actually use a 100–250 unit batch before your design changes, and your per-unit cost amortizes reasonably.
Expect to typically pay $1.50–$3.00 per custom box at this volume depending on size, print coverage, and finish. That’s more than Phase 1, but you’re getting a box that’s fully branded on the outside — which does different work than a sticker. It’s the difference between “this brand cares” and “this is clearly a real company.”
Easy Box Packaging runs custom boxes starting at small quantities — the process starts with your actual product dimensions, not a standard size catalog, so you’re not paying for box space you don’t need.
Phase 3: 500+ orders per month
Now you’re shopping volume. Get competitive quotes. Explore finishes. You’re not here yet — and you don’t need to be.
The Cheapest Upgrade With the Biggest Impact
If you’re only going to do one thing today, do tissue paper. Don’t skip it.
If I could only tell a first-time brand one thing about packaging, it would be this: get the tissue paper first. Before the custom box. Before the insert card. Tissue.
It’s counterintuitive because tissue paper seems decorative — almost frivolous. But it punches harder than any other single element in terms of the emotional response it creates when someone opens your package. Research suggests a significant portion of consumers are more likely to share an unboxing experience when the packaging feels special. Tissue is a big part of what makes packaging feel special.
The reason is sensory. Opening a box and pushing aside tissue paper is tactile. It creates a moment of anticipation. It signals that someone took the time to wrap this. Even a single sheet of tissue in your brand color — no printing required — does this job.
After tissue, here’s the rough impact-per-dollar ranking for branded add-ons:
- Tissue paper — highest emotional response per dollar, especially for social sharing
- Branded sticker or seal — closes the box with intention, works as exterior branding
- Insert card — extends the relationship past the purchase, great for review requests or next-purchase offers
- Custom printed box — biggest visual impact but highest cost; right for Phase 2 onward
That ordering matters when you’re working a tight budget. Start at the top.
For more on what actually moves the needle in unboxing moments, this breakdown on packaging mistakes that kill the unboxing experience is worth a read.
Digital Printing vs. Offset — Why It Matters at Your Order Size
Most brands get confused here — so let’s make it concrete.
Digital printing:
- No plate fees or setup charges
- Minimum runs of 25–100 units
- Per-unit cost is higher but consistent regardless of run size
- Easy to update designs between runs
- Good for full color, photographic designs, and iterative brands
- Right choice under ~500 units/month
Offset printing:
- Requires physical printing plates (typically $200–$500+ per color)
- Economical only at 500+ units, fully optimized at 1,000–2,000+
- Per-unit cost drops significantly at scale
- Design changes require new plates
- Right choice when you’re ordering 1,000+ at a time consistently
Here’s why that break-even matters practically: at 100 units, you need your per-box cost to absorb setup amortization. With offset, a $400 plate setup across 100 units adds $4.00 per box before you’ve printed a single ink drop. At 1,000 units, that same $400 is $0.40 per box — suddenly competitive. Digital has no plate cost, so there’s no amortization burden at small volumes.
One more thing worth knowing: single-color printing on kraft board often looks more premium than full-color on white. The natural texture of kraft with a clean one-color logo in black, white, or a brand color reads as intentional and design-forward. It’s also cheaper. Don’t assume full color is always the goal.
How to Cut Costs Without Cutting Quality
Budget doesn’t have to mean cheap-looking. The leverage is in a few specific decisions.
Right-size your boxes. This one has a double payoff. Oversized boxes don’t just waste material — they can increase your dimensional weight in shipping, which can meaningfully add to your carrier costs. A box that fits your product properly costs less to make and less to ship. It’s the most overlooked cost lever in small-brand packaging.
Reduce ink coverage. If you’re going custom printed, design with the print cost in mind. Heavy ink coverage (large solid areas of color) costs more than a clean, minimal design with your logo and a few elements. And a well-designed minimal box often looks better anyway.
Stick to two colors or fewer. Every additional color in offset printing is another plate and another pass. In digital it’s less of an issue, but keeping your design tight keeps costs down across any printing method. So if you’re tempted to add a third color because it looks cool in Figma — just don’t.
Order slightly ahead of need. Not massive batches — but ordering 250 units instead of 100 when you know you’ll use them within 60 days usually brings the per-unit cost down meaningfully. Just don’t let cash get locked up in boxes you won’t need for six months.
Consider stock sizes for Phase 1. Standard box dimensions are cheaper per unit than custom die-cut sizes. If a standard size fits your product reasonably well, use it and put the savings into your branded layers.
For a deeper look at how eco-friendly materials fit into the cost picture, here’s what actually works and what it costs — including FSC-certified options, which we carry across our corrugated line.
Where Not to Cut Corners
Some cost-cutting moves pay for themselves. Others show up at exactly the wrong moment — usually when a customer opens their package.
Don’t cheap out on board weight. The structural integrity of your box is doing real work. A box that arrives crushed, creased, or partially open doesn’t just look bad — it signals to your customer that you don’t care. Use the right board weight for your product’s weight and fragility. This isn’t where you save money.
I want to be direct about why we push back on cheap board: we’ve seen brands save $0.08 per box on thinner material and then spend 3x that amount per order processing returns from transit damage. The math never works out in their favor.
Always approve a physical sample before you run. Colors look different on screen than on printed cardboard. Textures, brightness, ink absorption — none of it is predictable without holding the actual thing. Skipping the sample to save a week is one of the most expensive decisions a small brand can make. I’ve seen it go wrong more times than I can count — a full run delivered in a shade of blue that looked navy on screen and printed closer to purple. Any supplier worth working with will send you a sample. If they won’t, that’s your answer.
Vet your suppliers. The custom packaging space has a lot of brokers who add markup and slow lead times without adding value. Know who’s actually printing your boxes. Ask about their materials sourcing. Ask about FSC certification if sustainability matters to your brand or your customers. Sound familiar? You’ve probably gotten a quote from a broker without realizing it.
Don’t design around your logo alone. A box with only your logo on it usually looks less finished than a box with intentional typography, a brand color used as a background, or even a simple pattern. Spend time on the design. It’s doing marketing work every time someone opens it — and packaging drives repeat purchases in ways most brands underestimate.
Your Phase-In Roadmap: Affordable Custom Boxes for Small Brands
Here’s how the progression actually looks as your order volume grows.
0–50 orders/month
Stock boxes. One sheet of tissue in your brand color. A sticker seal on the outside. If budget allows, add an insert card. Total add-on: typically under $0.50 per order. The only thing to optimize right now is box fit — find a stock size that doesn’t force you to ship air.
50–200 orders/month
Keep the tissue. Keep the insert. Start upgrading the sticker to something with more quality — a custom wax seal, a die-cut label, something that feels intentional rather than printed at home. Most importantly: start getting quotes on short-run digital boxes so Phase 2 doesn’t blindside you.
200–500 orders/month
Phase 2 territory. If your design has stabilized and the margins support it, move to a short-run custom box — 150–250 unit batches work well here. You’re still keeping tissue and insert card. The difference is that your package now reads as a real brand from the outside, not just the inside.
I’ll be honest: I’m not entirely sure exactly when Phase 2 clicks for every brand — it depends on your product weight, your margins, and how much your design is still changing. Some brands make the jump at 150 orders a month and don’t look back. Others wait until 400. Neither is wrong.
We’ve worked with more than 10,000 brands through exactly this progression — and the ones who start at Phase 1 and iterate tend to build stronger packaging instincts than those who jump straight to a full custom run. The economics usually make Phase 2 viable faster than founders expect, especially once they see what right-sized shipping boxes do to their carrier costs.
500+ orders/month
Request competitive quotes on higher-volume runs. Explore finishes. Consider whether any structural improvements (inserts, compartments, magnetic closures depending on your product category) would drive enough perceived value to justify the cost. Review your internal linking between packaging elements — custom mailer boxes are worth evaluating separately at this volume if you’re shipping direct-to-consumer.
FAQ
What’s the actual minimum order for custom printed boxes?
With digital printing, 25–100 units is common depending on the supplier and box dimensions. There are no plate fees, so the cost per unit doesn’t change dramatically between 50 and 150. (Exact numbers depend on your box size and specs — worth getting a real quote rather than planning off averages.)
Is a custom sticker on a plain box actually good enough?
For Phase 1, yes. A well-designed sticker on a clean stock box reads as intentional branding. The key is design quality — a cheap-looking sticker in a bad font hurts more than it helps. Invest in the sticker design even if the box itself is plain.
Can I do single-color custom printing affordably?
Yes, and it often looks better than full color on kraft. Single-color print on natural kraft board is a legitimate aesthetic, not a budget compromise. Many premium brands use exactly this look by choice.
How much does tissue paper actually matter?
More than most people think. It’s the highest-impact single element for unboxing feel relative to its cost. Don’t skip it.
What about kraft vs. white boxes?
Kraft reads as natural, sustainable, and slightly artisanal. White reads as cleaner and more clinical. Neither is objectively better — it depends on your brand. What matters is that your design is built for whichever substrate you choose, not copied from one and applied to the other.
Conclusion
The brands still shipping in plain brown boxes aren’t doing it because affordable custom boxes for small brands are out of reach. They’re doing it because they never sat down and ran the numbers — and honestly, because the packaging industry has done a decent job of making the process sound more complicated than it is.
I’ve watched small brands stall for 6–12 months waiting to “be ready” for custom packaging, and it drives me a little crazy. A sheet of tissue, a sticker, and an insert card cost less than a dollar in add-ons and turn your package into something worth photographing. That’s organic reach every time someone shares their unboxing. You’re leaving that on the table while you wait.
You don’t need 500 units. You don’t need a big budget. You need to stop waiting for scale you don’t have yet and start building the brand you’re trying to become. Phase 1 is typically $0.50. Start there.
Exact pricing varies by box size and specs — get a quote, don’t estimate.