
Most brands that come to us frustrated about packaging timelines say the same thing: “The manufacturer is so slow.” But when I ask them to walk me through what happened, the story is almost always the same — three weeks of back-and-forth on artwork, two rounds of structural revisions that could have been caught in the brief, an internal approval process that involved five people and no clear decision-maker.
The manufacturer wasn’t slow. The process was broken.
The custom box manufacturer process has predictable phases, predictable bottlenecks, and predictable places where brands accidentally double their timeline. Understanding how it actually works — and what to bring to each stage — is the difference between a 6-week turnaround and a 14-week ordeal that costs you a product launch.
What the Timeline Actually Looks Like
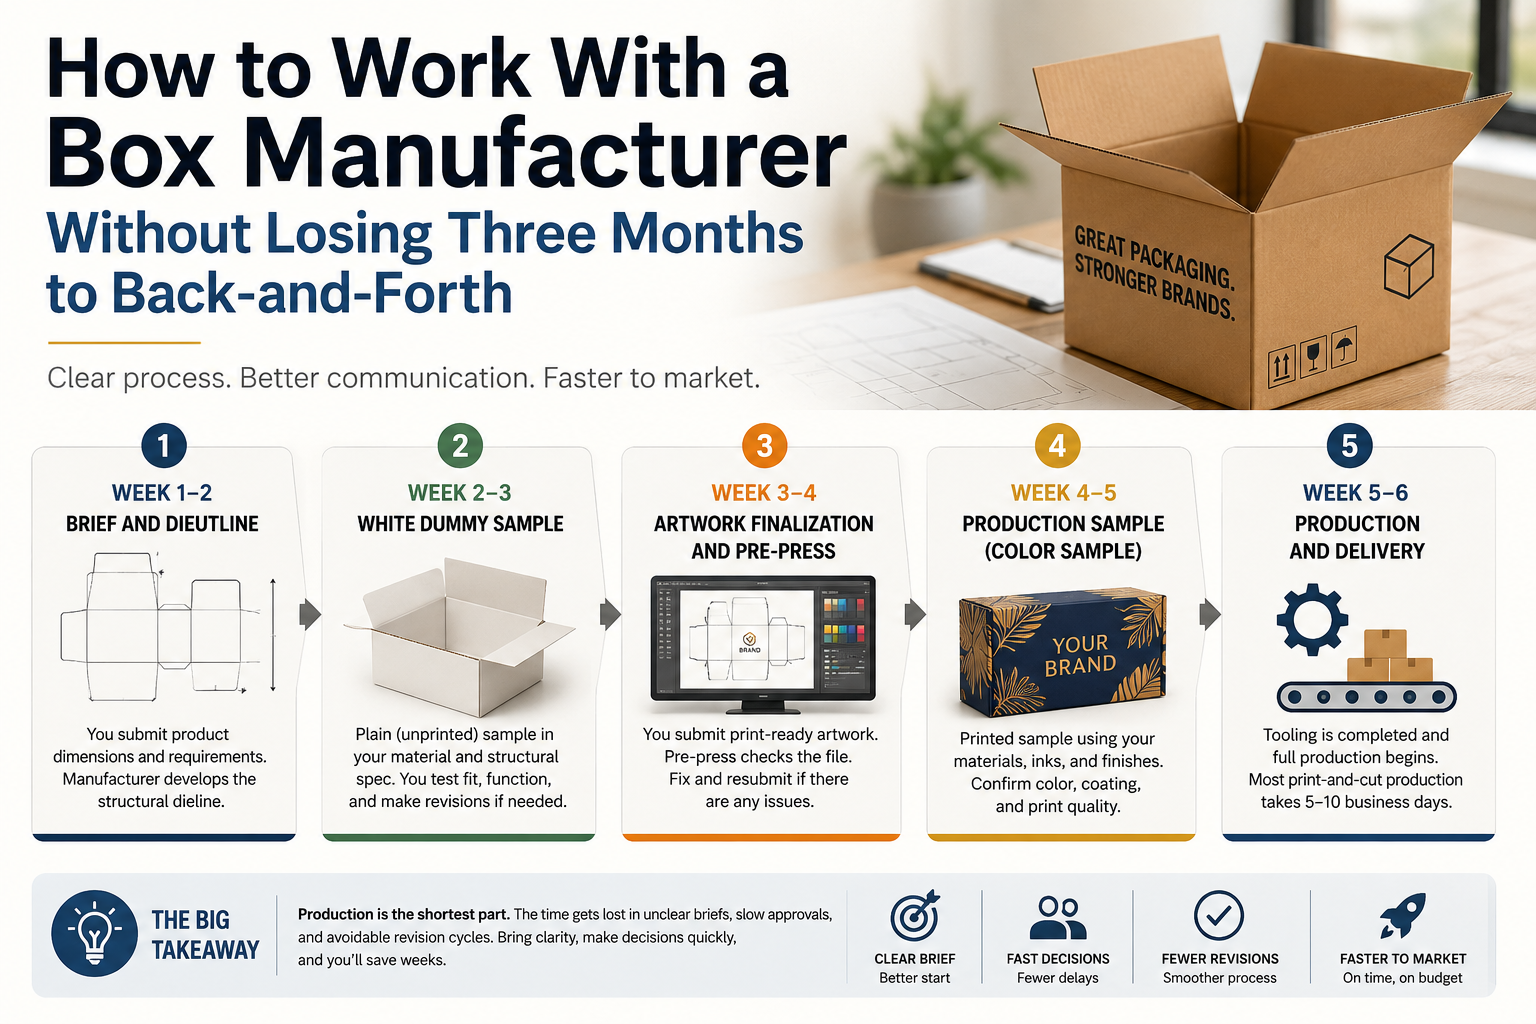
Production is the shortest part. Most brands don’t realize that. For a standard custom corrugated run, the print-and-cut production step takes 5–10 business days. The months disappear in the phases before production starts.
Here’s a realistic breakdown for a domestic custom box order:
Week 1–2: Brief and dieline. You submit your product dimensions and requirements. The manufacturer develops a structural dieline — the flat technical template that defines every fold, cut, score, and glue tab. If your brief is clear, this phase runs smoothly. If it’s vague, you’re starting the back-and-forth here.
Week 2–3: White dummy sample. The manufacturer produces a plain (unprinted) sample in your actual material and structural spec. This is what you assemble, fill with your product, close, and test. If it fits correctly and functions as needed, you approve it and move to artwork. If not, you revise — and add another 5–7 days per revision cycle.
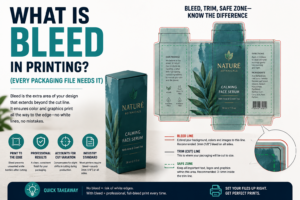
Week 3–4: Artwork finalization and pre-press. Once structural approval is done, you submit your print-ready artwork file. Pre-press checks for color mode, bleed, font embedding, resolution, and dieline registration. If your file has problems, you fix and resubmit. Each round costs 1–3 days.
Week 4–5: Production sample (color sample). A printed sample using your actual materials, inks, and finishes. This is your final approval point. Color fidelity, coating, lamination, and print registration are all confirmed here. Approving this triggers tooling and production.
Week 5–8: Production and shipping. After approval, tooling takes 2–4 days and can’t start until that approval is received. Production runs 5–10 days. Shipping adds 3–7 days depending on your location and shipping method.
That’s the standard flow for a well-managed project. The brands that experience 3-month timelines aren’t experiencing unusual delays — they’re experiencing the compounding effect of small inefficiencies at every stage, each adding days that add up to weeks.
The Dieline: Get This Right Before Anything Else
The dieline is the spec. Everything downstream — artwork, sampling, tooling, production — is built on it. If your dieline has errors, those errors get reproduced through every subsequent step until someone catches them, usually at the worst possible time.
The most common dieline problems brands run into:
Wrong product dimensions. The box is built around your product, not around an approximation. Measure your actual product in its actual state — packaged with any inserts, tissue, or fill included. A box that’s 5mm too small in one dimension means a resample that adds a week. Measure before submitting, not after.
Ignoring board thickness. Corrugated board has thickness. When you fold and glue a corrugated box, that board thickness takes up interior space. Single-wall B-flute adds roughly 3mm per wall. If your product fits your target interior dimension precisely, you need to account for board thickness in the spec or your product won’t fit the finished box.
Not specifying the flute and wall construction. B-flute, E-flute, single-wall, double-wall — these aren’t just material preferences. They affect how the dieline is drawn (different bend radii, different scoring depths), what the finished box weighs, and what structural performance it delivers. Your brief should specify what you need, not leave it to the supplier to guess.
Treating the dieline as a starting point for design exploration. The dieline is a technical document. If you’re using the sample phase to explore structural options — maybe a tuck-top, maybe a magnetic closure, maybe a different opening mechanism — you’re adding weeks of revision cycles before you’ve even started artwork. Decide the structure before you submit the brief.
Understanding common packaging mistakes that derail the unboxing moment helps clarify what the structure needs to accomplish before you commit to a dieline.
The Artwork Trap
Industry data suggests that 89% of packaging artworks go through five or more rounds of review before approval. Five rounds. Each round adds 2–5 days. The math is brutal: five rounds at three days each is 15 additional days — three weeks — before production even starts.
Most of those revision rounds aren’t about fixing real problems. They’re about internal misalignment that surfaces after the file is submitted rather than before. Someone didn’t know about the logo update. The new tagline wasn’t approved at the file submission stage. The product manager sees the proof and realizes the color doesn’t match what they imagined.
I’ve seen brands go through six rounds of artwork revision on a box that didn’t fundamentally change between round one and round six. All that changed was the number of people who got to see it and add a comment. Six rounds, each adding 3 days. That’s three weeks on a box that was essentially correct in round one.
The fix isn’t faster review — it’s tighter pre-submission alignment. Before you submit artwork to your manufacturer, confirm three things internally: the logo file is the current approved version, the copy is final and approved, and the person submitting the file has authority to approve the final proof without additional sign-offs. If any of those three things are uncertain, resolve them before submission. Not after.
This connects directly to how packaging builds brand consistency over time — every revision cycle is a chance for inconsistencies to slip in that erode the brand signal you’re trying to build.
The One-Person Rule
The single most effective change a brand can make in their packaging process is to assign one person who can approve, without committee sign-off, at every stage. One person who can look at the white dummy, say “approved,” and move the project forward. One person who can sign off on the color proof. One person who can authorize the production run.
This sounds obvious. It’s almost never done. Packaging decisions typically involve marketing, procurement, the founder, sometimes legal, sometimes the operations manager who has opinions about flute selection. Every additional stakeholder adds time. Not because their input isn’t valuable — sometimes it is — but because information moves through organizations slowly, and “just one more person to sign off” is how 3-day review cycles become 10-day review cycles.
Assign the decision-maker before the project starts. Make it explicit to the manufacturer that this person has authority. Brief them on the full brief so they’re not surprised by anything they see in a proof. Then let them make the calls.
What to Send Your Manufacturer in the First Email
The brief quality determines the first-round quality. A vague brief produces a vague dieline, which produces revisions. A specific brief produces a precise dieline that often clears structural approval in a single round.
A complete first brief includes:
Product dimensions. Length, width, height — measured with any fill or insert included. Note whether the product needs snug fit or loose fit.
Product weight. Determines board grade and wall construction recommendations.
Box style. Mailer box, RSC shipper, tuck-top, auto-lock bottom, rigid box — specify the style, not just “a box.” If you’re unsure, describe the function you need and let the manufacturer recommend the structure.
Quantity. This determines whether offset or digital printing is the right method and affects pricing. If you’re ordering 200 units, that’s a different spec conversation than 5,000 units. Our guide to custom packaging printing methods explains where the volume thresholds sit and what each method delivers.
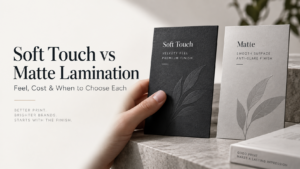
Print requirements. Number of colors, interior vs exterior printing, Pantone matches, finishes (matte, gloss, soft touch, foil, emboss). Be specific. “Full color” is not a complete print spec.
Timeline and quantity. Your target in-hand date and whether you have any flexibility. This helps the manufacturer flag any constraints before you’re committed to a timeline that can’t be met.
Bringing this information to the first email compresses the brief-to-dieline phase from a week of back-and-forth into a single efficient exchange.
How to Handle Revisions Without Spiraling
Revisions happen. The goal isn’t zero revisions — it’s making sure each revision is the last one of its type.
The rule I follow: never submit fragmented feedback. Wait until everyone who needs to review the sample or proof has done so, consolidate all feedback into one clear message, and submit once. Sending “two more small things” after you’ve already sent your feedback is how a single revision round becomes three.
Separate structural feedback from aesthetic feedback. When reviewing a white dummy sample, focus exclusively on structure: does it fit the product, does it close correctly, does it stack cleanly, does the opening mechanism work? Save print and color preferences for the color proof stage. Mixing structural and aesthetic feedback at the sample stage creates confusion about what was approved and what wasn’t.
When you see a problem in a proof, describe the problem precisely rather than the solution generally. “The logo is too small” is less useful than “the logo should be 40mm wide, centered on the front panel, positioned 20mm from the top edge.” Precise feedback produces precise corrections. Vague feedback produces another round of interpretation.
Domestic vs. International: Timing the Difference
The choice between domestic and international manufacturing is ultimately a lead time calculation. Domestic suppliers — primarily in the US — typically deliver custom corrugated orders in 4–6 weeks from brief to delivery. International suppliers, primarily in China and Vietnam, deliver in 8–14 weeks from brief to US delivery, including ocean freight and customs clearance.
At first glance, domestic looks faster. But for high-volume, stable SKUs where you’re planning 6+ months ahead and ordering 5,000+ units, international manufacturing at $0.60–0.95/unit can represent meaningful savings over domestic runs at $1.20–1.80/unit. The decision isn’t just about speed — it’s about whether your planning horizon and volume justify the longer lead time.
What changes the math: how stable your design is. If you’re still iterating on the product or brand, international manufacturing is a bad bet. You’re either locked into the spec for the full production run or paying for expensive mid-run changes. For brands that are still in the design-testing phase, domestic digital printing at 200–500 units is more practical even at a higher per-unit cost. Our small brand packaging guide covers this volume-to-investment decision in detail.
FAQ: Working With a Custom Box Manufacturer
How long does a custom box order realistically take from brief to delivery?
For a domestic supplier, 6–10 weeks from a complete brief to delivery is realistic for a well-managed project. For international suppliers, 12–16 weeks including ocean freight. These timelines assume one or two revision rounds. Projects with multiple structural revisions or slow artwork approval add 1–3 weeks per additional round.
What causes most packaging delays?
Artwork approval, by a wide margin. Production is typically the shortest phase. Most delays happen in pre-press (file problems), internal review cycles (too many approvers), and structural revisions driven by an under-specified brief.
What’s the difference between a white dummy and a color sample?
A white dummy is an unprinted structural sample in your actual material — used to confirm fit, dimensions, and structural function. A color sample is a fully printed, finished sample using your actual artwork, inks, and finishes — used to confirm print quality and color fidelity before approving the production run. Both are necessary; skipping the white dummy phase is a common mistake that leads to production runs with structural problems.
How should I submit artwork to avoid pre-press issues?
Submit files in CMYK (not RGB), at minimum 300dpi, with fonts embedded, bleed included to the dieline’s specified bleed margin, and with a separate layer for finishing (foil, spot UV, emboss). Ask your supplier for a print specification sheet before submitting — most suppliers have one. Match your file to their spec rather than submitting and hoping it passes pre-press review.
Can I change the design after the production sample is approved?
Technically yes, but practically no. Changes after production sample approval require new plates (for offset runs), which adds 2–4 days and costs. Changes after production starts are significantly more expensive and may require scrapping partially produced units. The production sample approval is the last clean exit point.
What’s a reasonable number of sample rounds before production?
For structural: one round in most cases, two for complex structures or first-time supplier relationships. For color: one round if your brief was specific and your file was correct. More than two rounds on either typically signals a communication problem that should be addressed directly rather than through additional revision cycles.
How do I find a reliable custom box manufacturer?
Start by requesting samples before committing to an order. Evaluate print quality, structural consistency, and whether the sample matches what was specified — not just whether it looks good in general. Ask how they handle pre-press review, what their revision policy is, and who your point of contact will be during production. A manufacturer who answers those questions clearly is one worth working with.
The Process Is the Product
The brands that get great packaging consistently aren’t the ones with the biggest budgets — they’re the ones that treat the process with the same care they bring to the product itself. A complete brief. One decision-maker. Consolidated feedback. Structural approval before artwork. Those aren’t heroic acts of project management. They’re just the habits that keep three-week projects from becoming three-month projects.
The manufacturer is almost never the bottleneck. Nine times out of ten, when I trace a delayed packaging order back to its source, the delay was generated on the brand side — a vague brief, fragmented feedback, or an approval process that required more people than the decision warranted.
Easy Box Packaging works through this process with brands at every stage, from first-time custom box orders at 200 units to high-volume offset runs that need precise Pantone matching and structural prototyping. See our ecommerce packaging options to start a conversation about what your project needs — and what timeline is realistic for it.
If you’re trying to understand the volume and budget side of this decision before engaging a manufacturer, our custom packaging budget guide gives you the framework for making that call at different stages of your business.